How to set up Traffic DSP
First of all, find an SSP you will buy traffic from.
Now, let us go step-by-step to understand how the providers' section works and how to work with it.
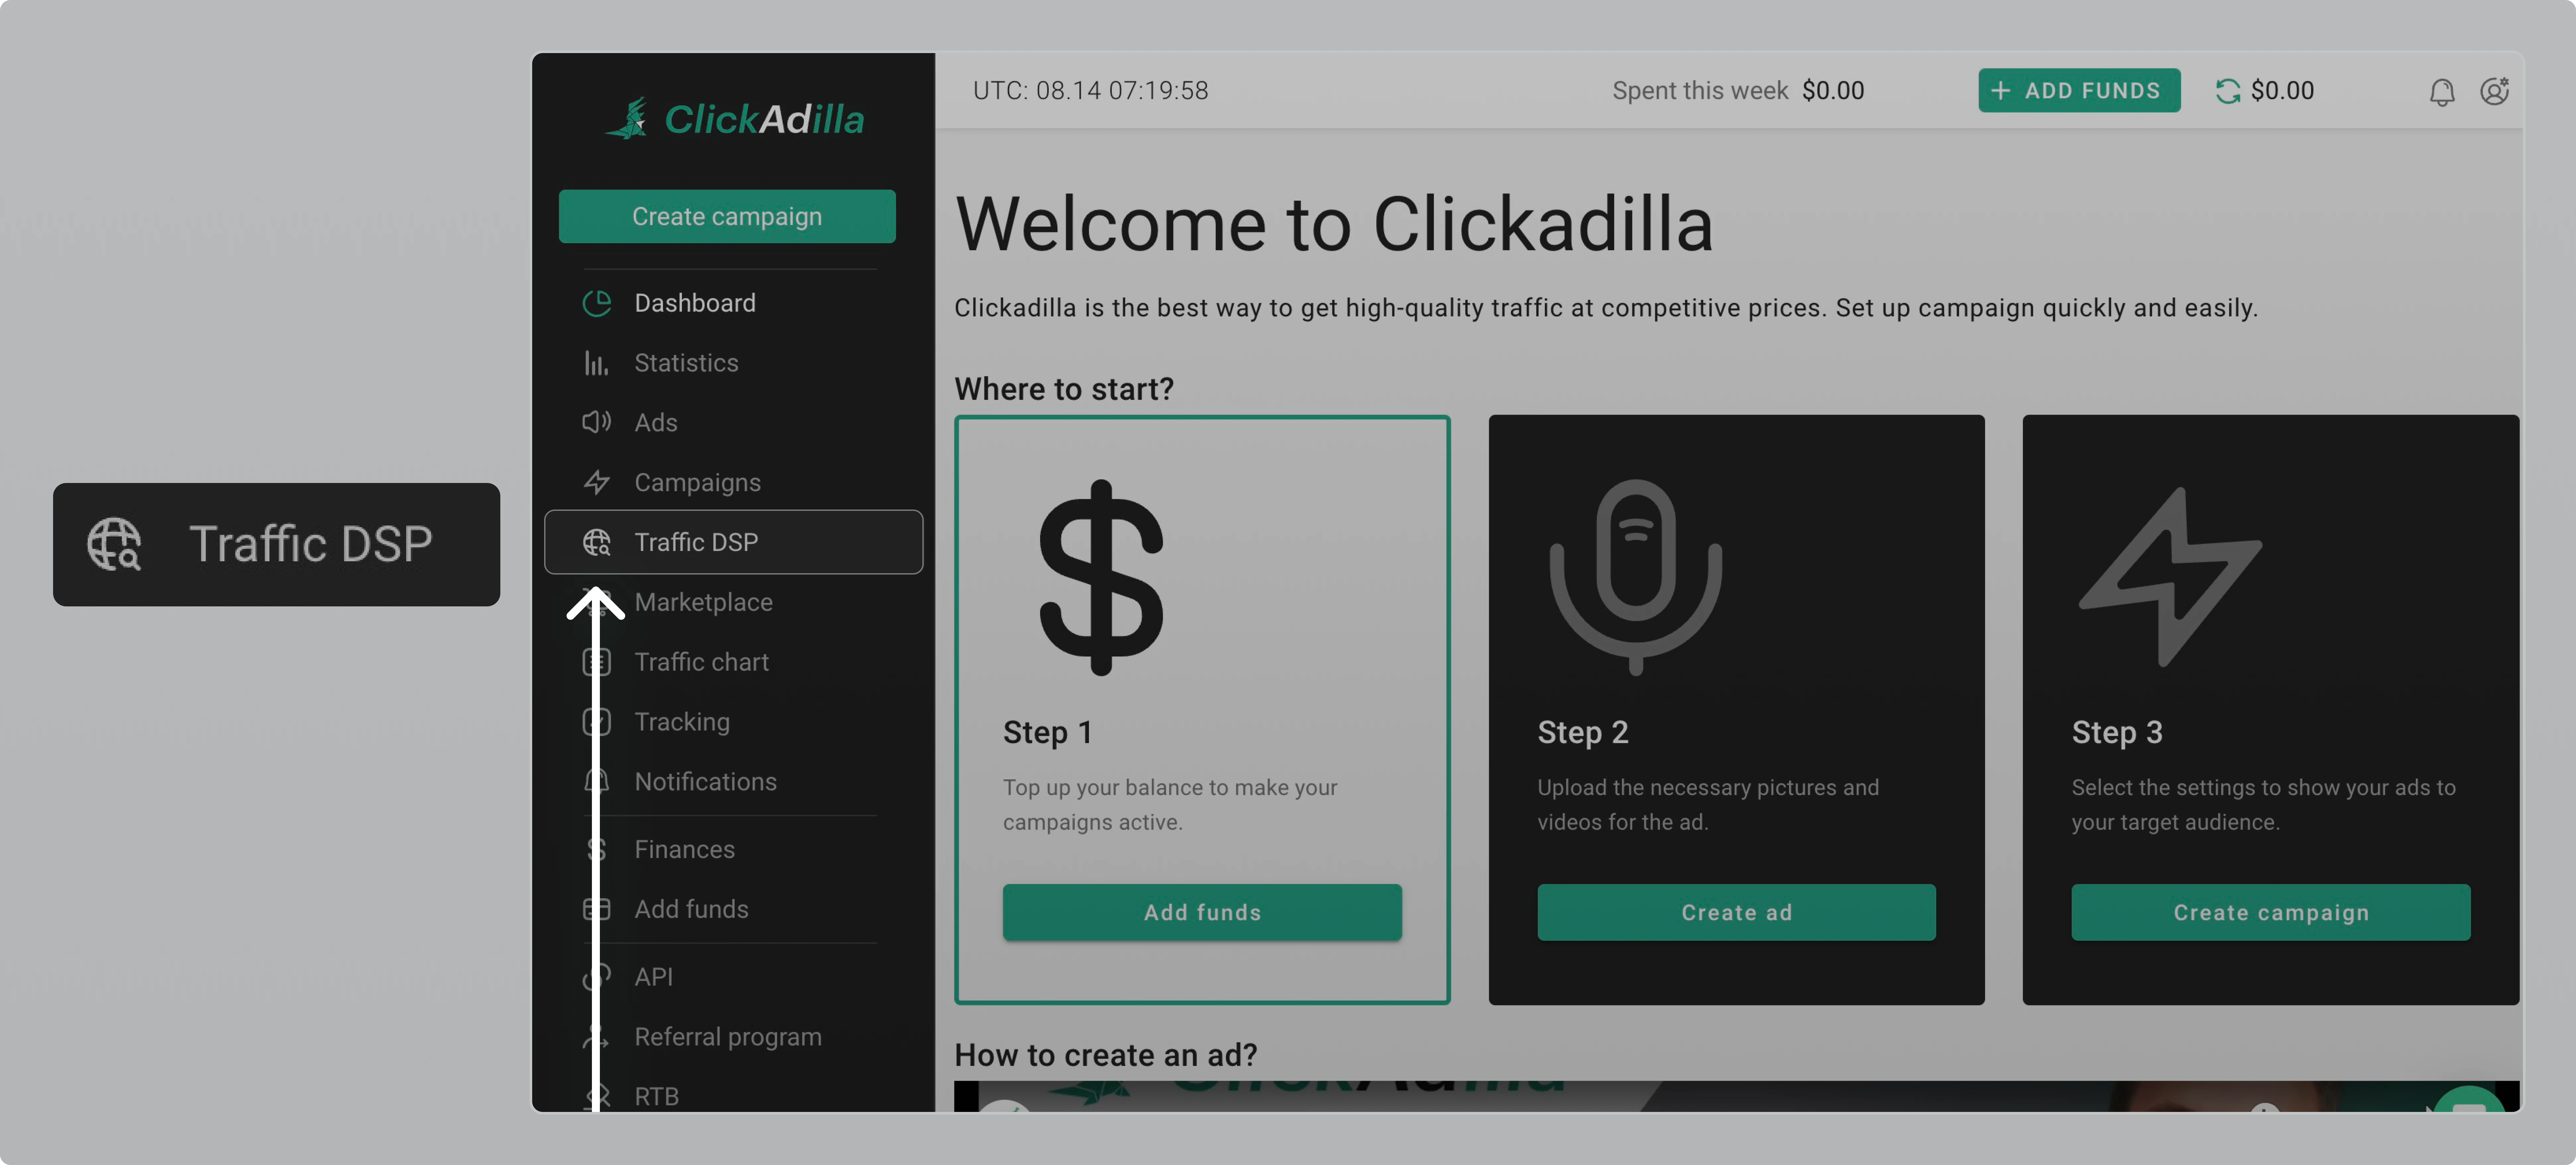
The providers' section is available at your ClickAdilla account in a sidebar menu on the left. It is called Traffic DSP.
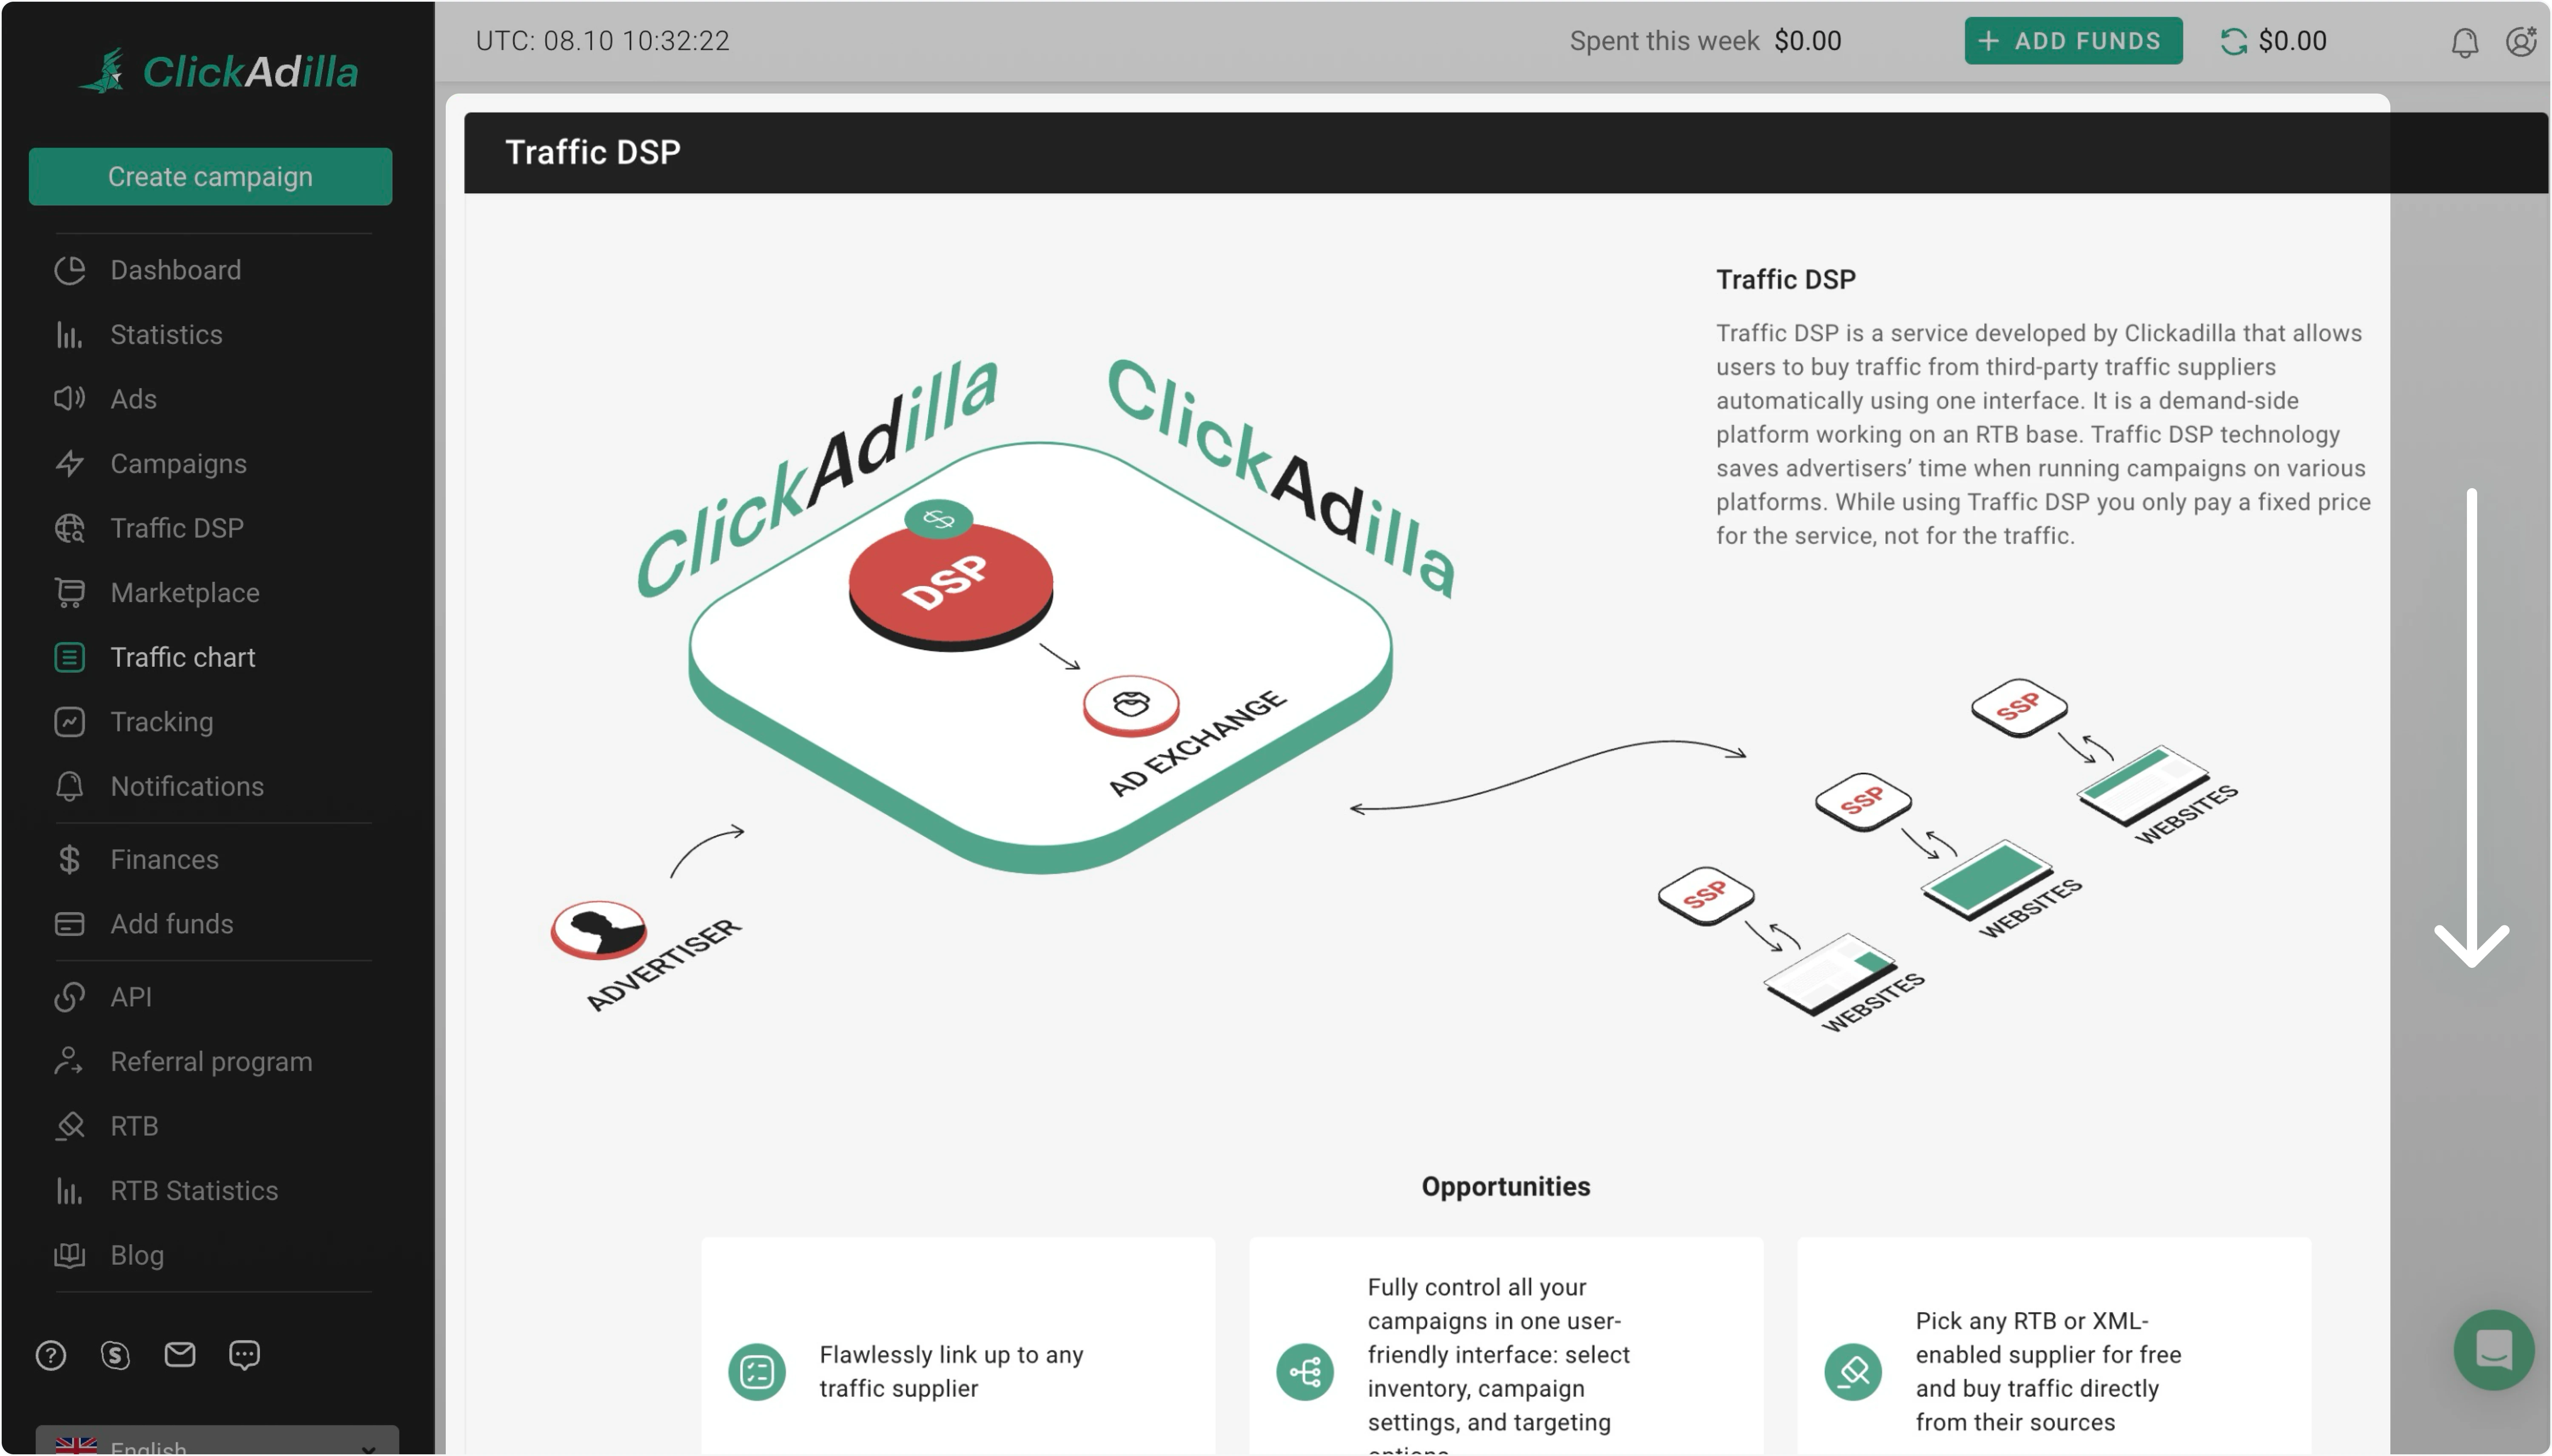 Then, scroll down Traffic DSP page until Choose a plan section.
1. Choose a plan. At the moment there are three plans available:
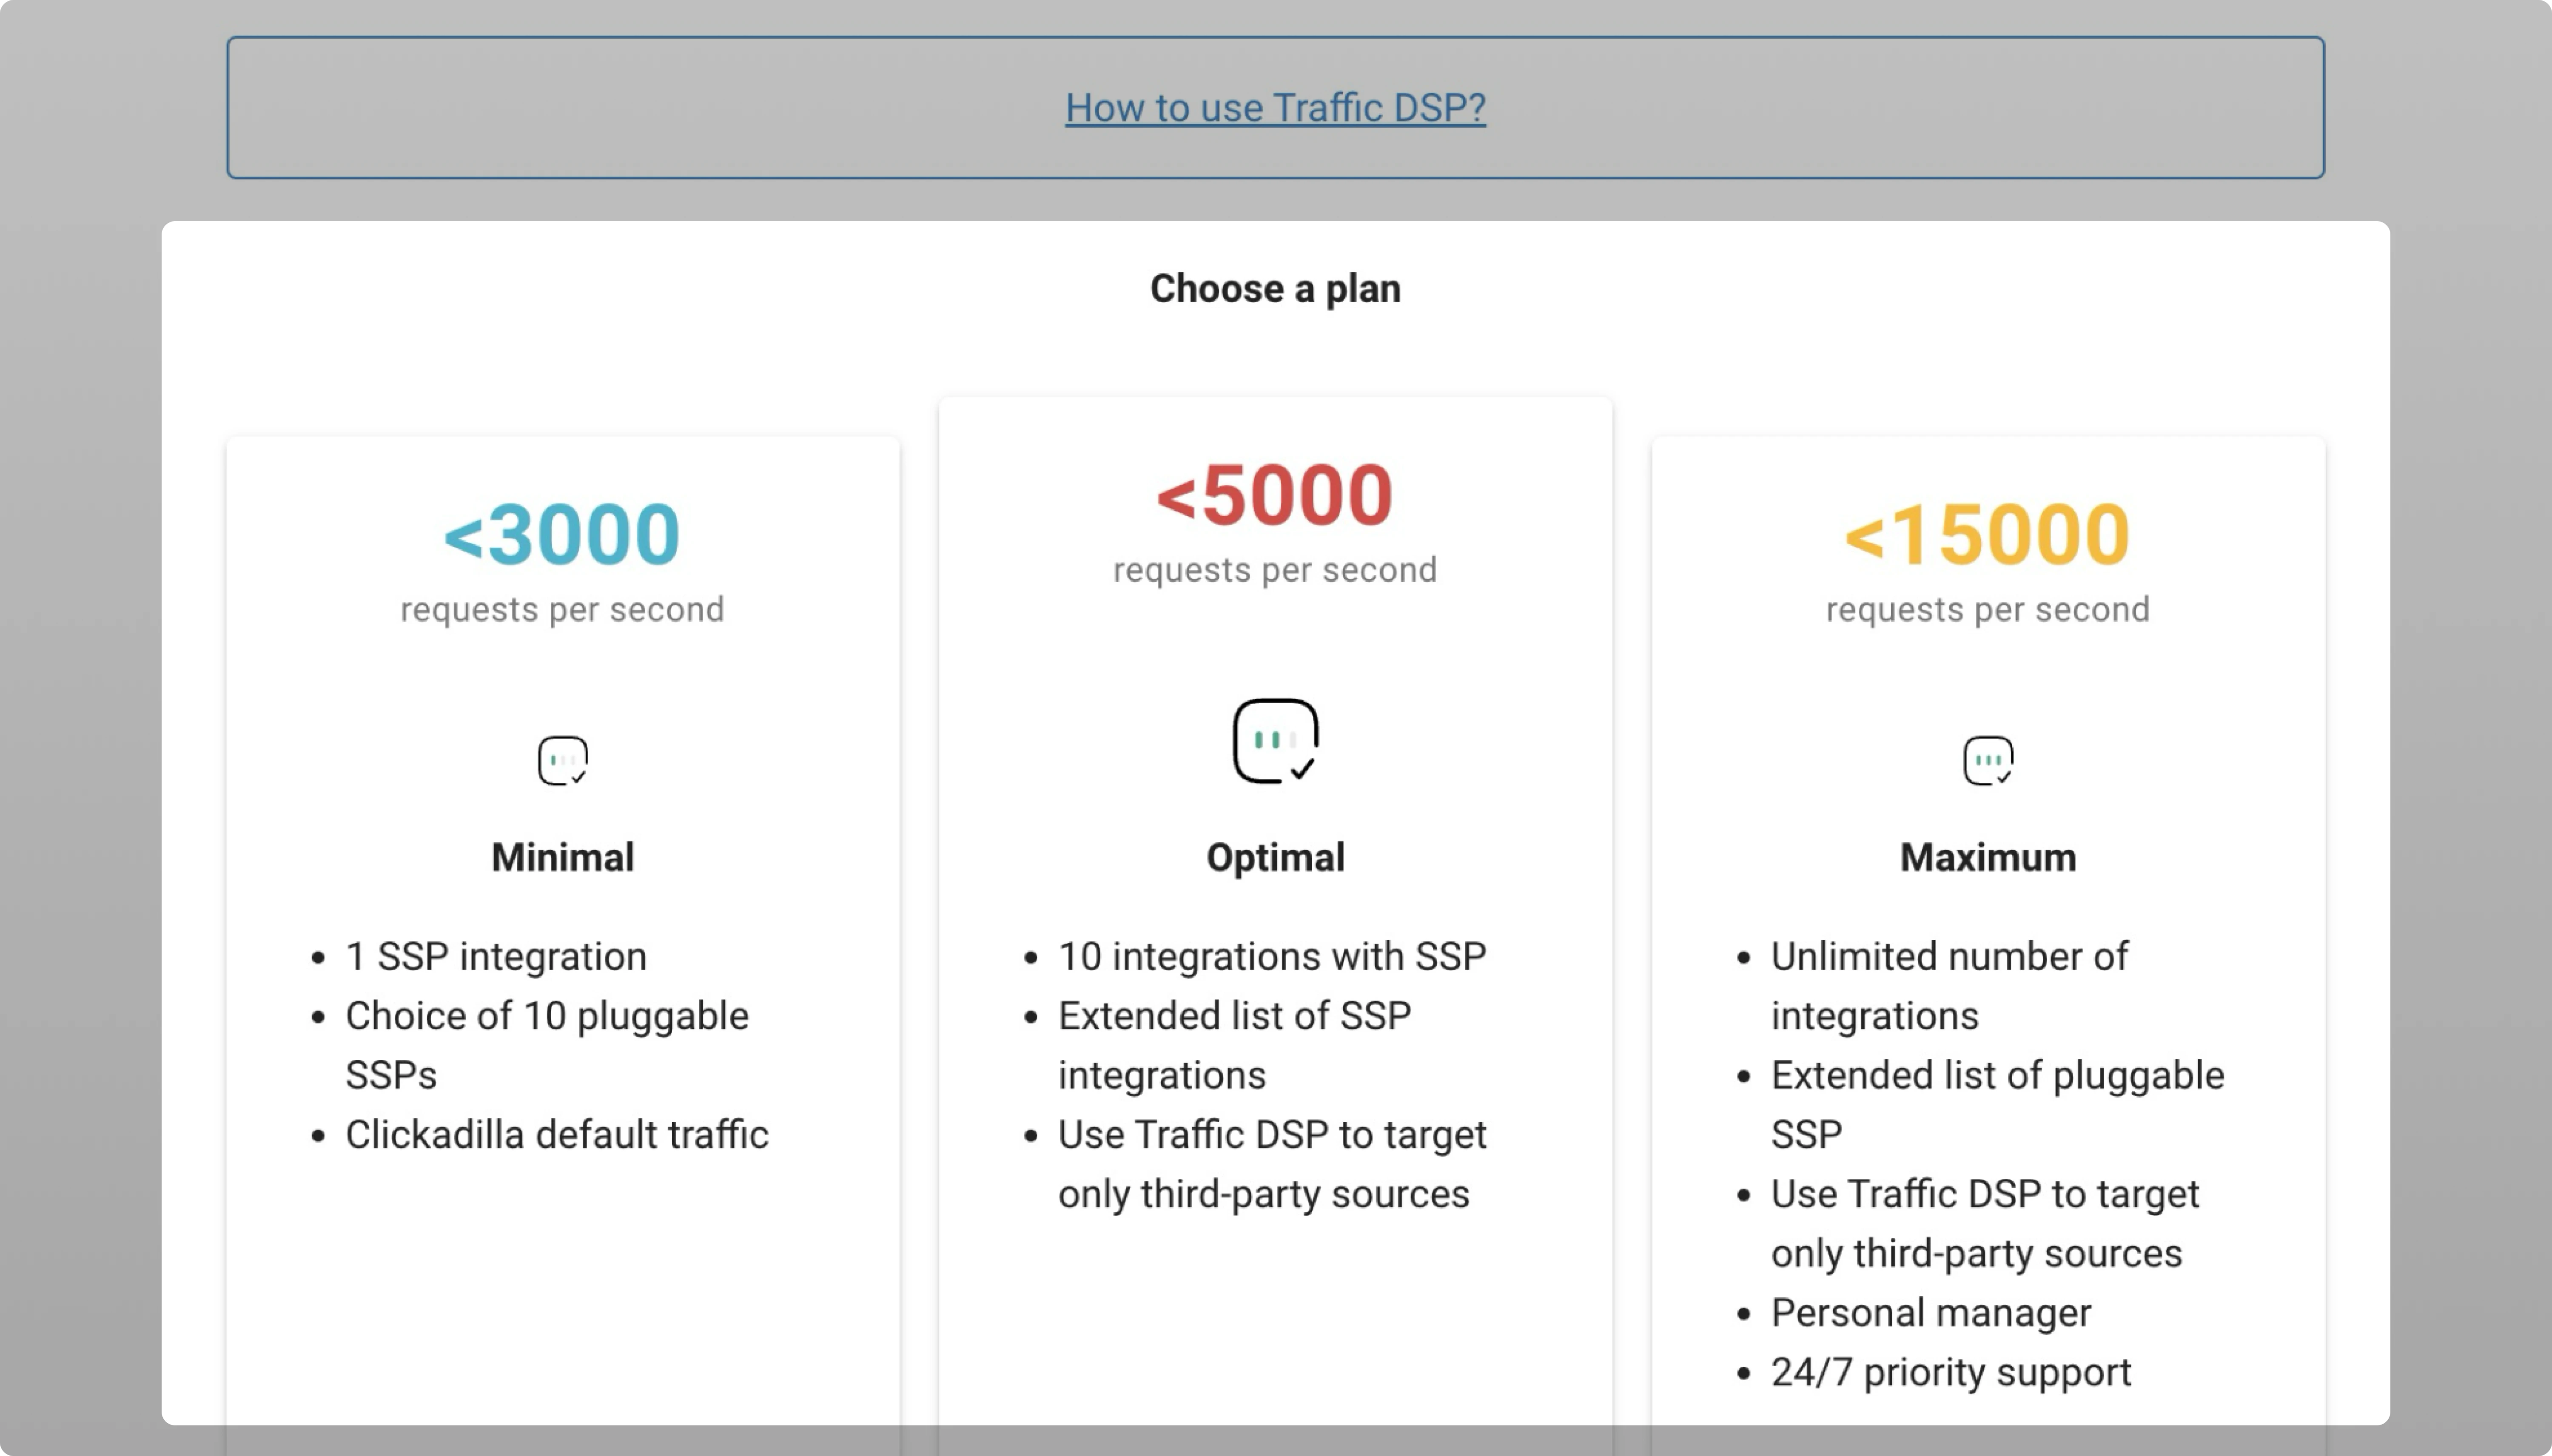
Minimal
The minimal plan assumes up to 3,000 auction participation requests per second.
The minimal plan includes the following:
- 1 SSP integration;
- Choice of 10 pluggable SSPs;
- ClickAdilla default traffic.
Optimal
The optimal plan assumes up to 5,000 auction participation requests per second.
The optimal plan includes the following:
- 10 SSP integration;
- Extended list of pluggable SSPs;
- Option to disable ClickAdilla traffic.
Maximum
The maximum plan assumes up to 15000 auction participation requests per second.
The maximum plan includes the following:
- Unlimited number of SSP integrations;
- Extended list of pluggable SSPs;
- Option to disable ClickAdilla traffic.
2. Click the Buy Now button
There is a Buy Now button under each plan.
The funds will be debited from your account, or, if there are insufficient funds, you will be asked to top up your balance
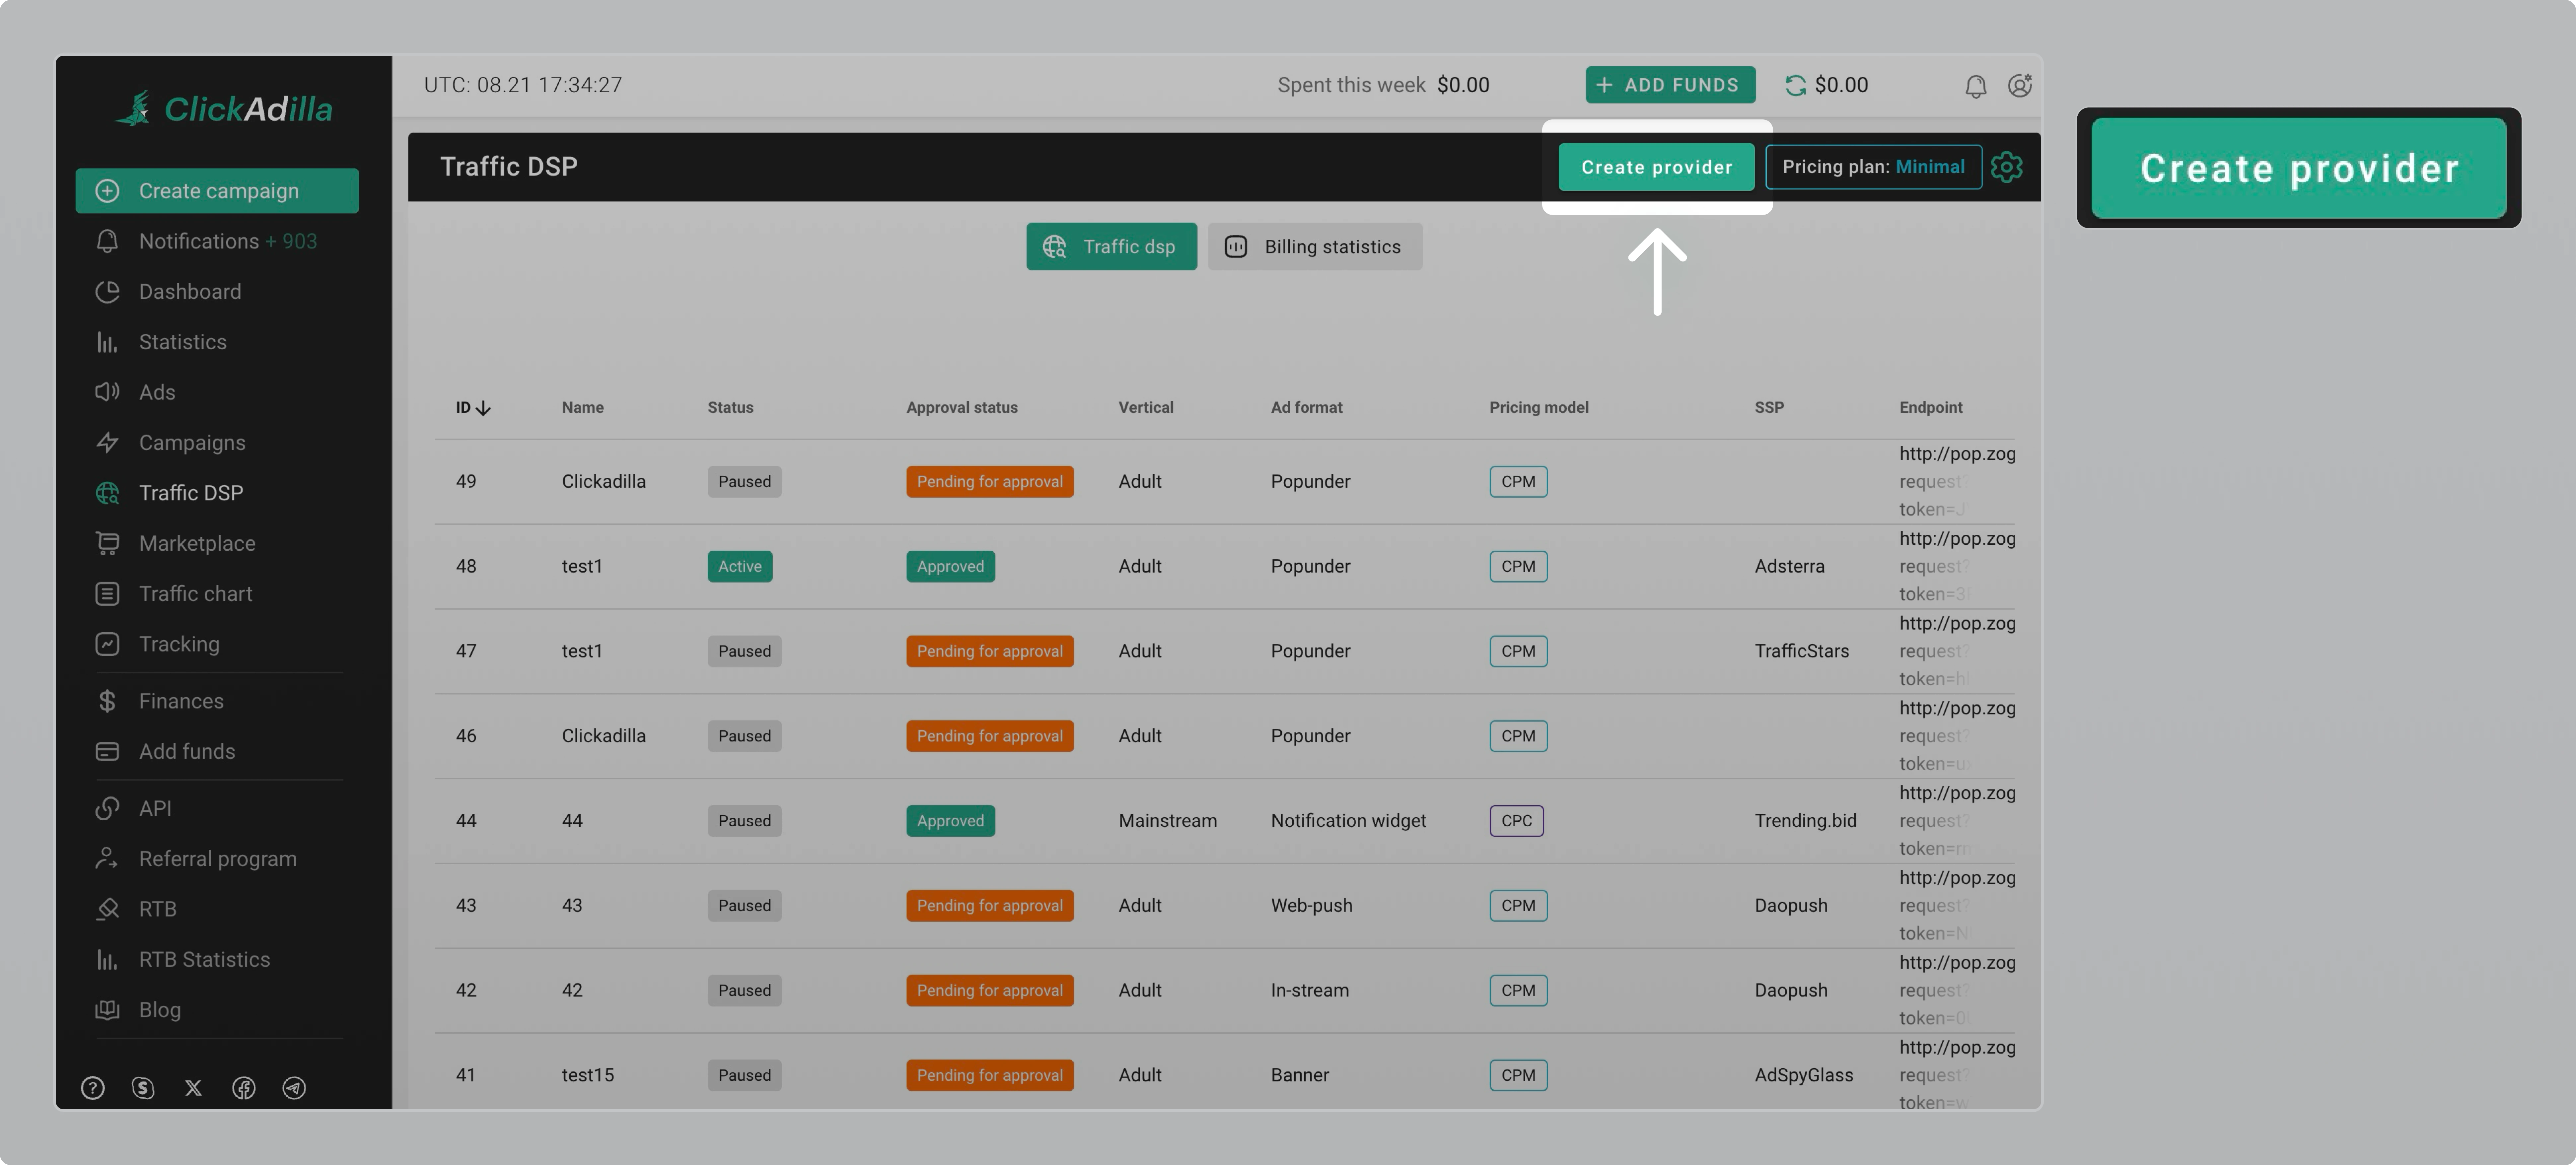
3. Go to Traffic DSP once again.
Here you will see all providers integrated into your interface. You will only see ClickAdilla as a main provider if you haven’t integrated any third-party traffic sources yet. For now, click the Create Provider button.
4. Fill out the form for creating a new provider
Form filling example:
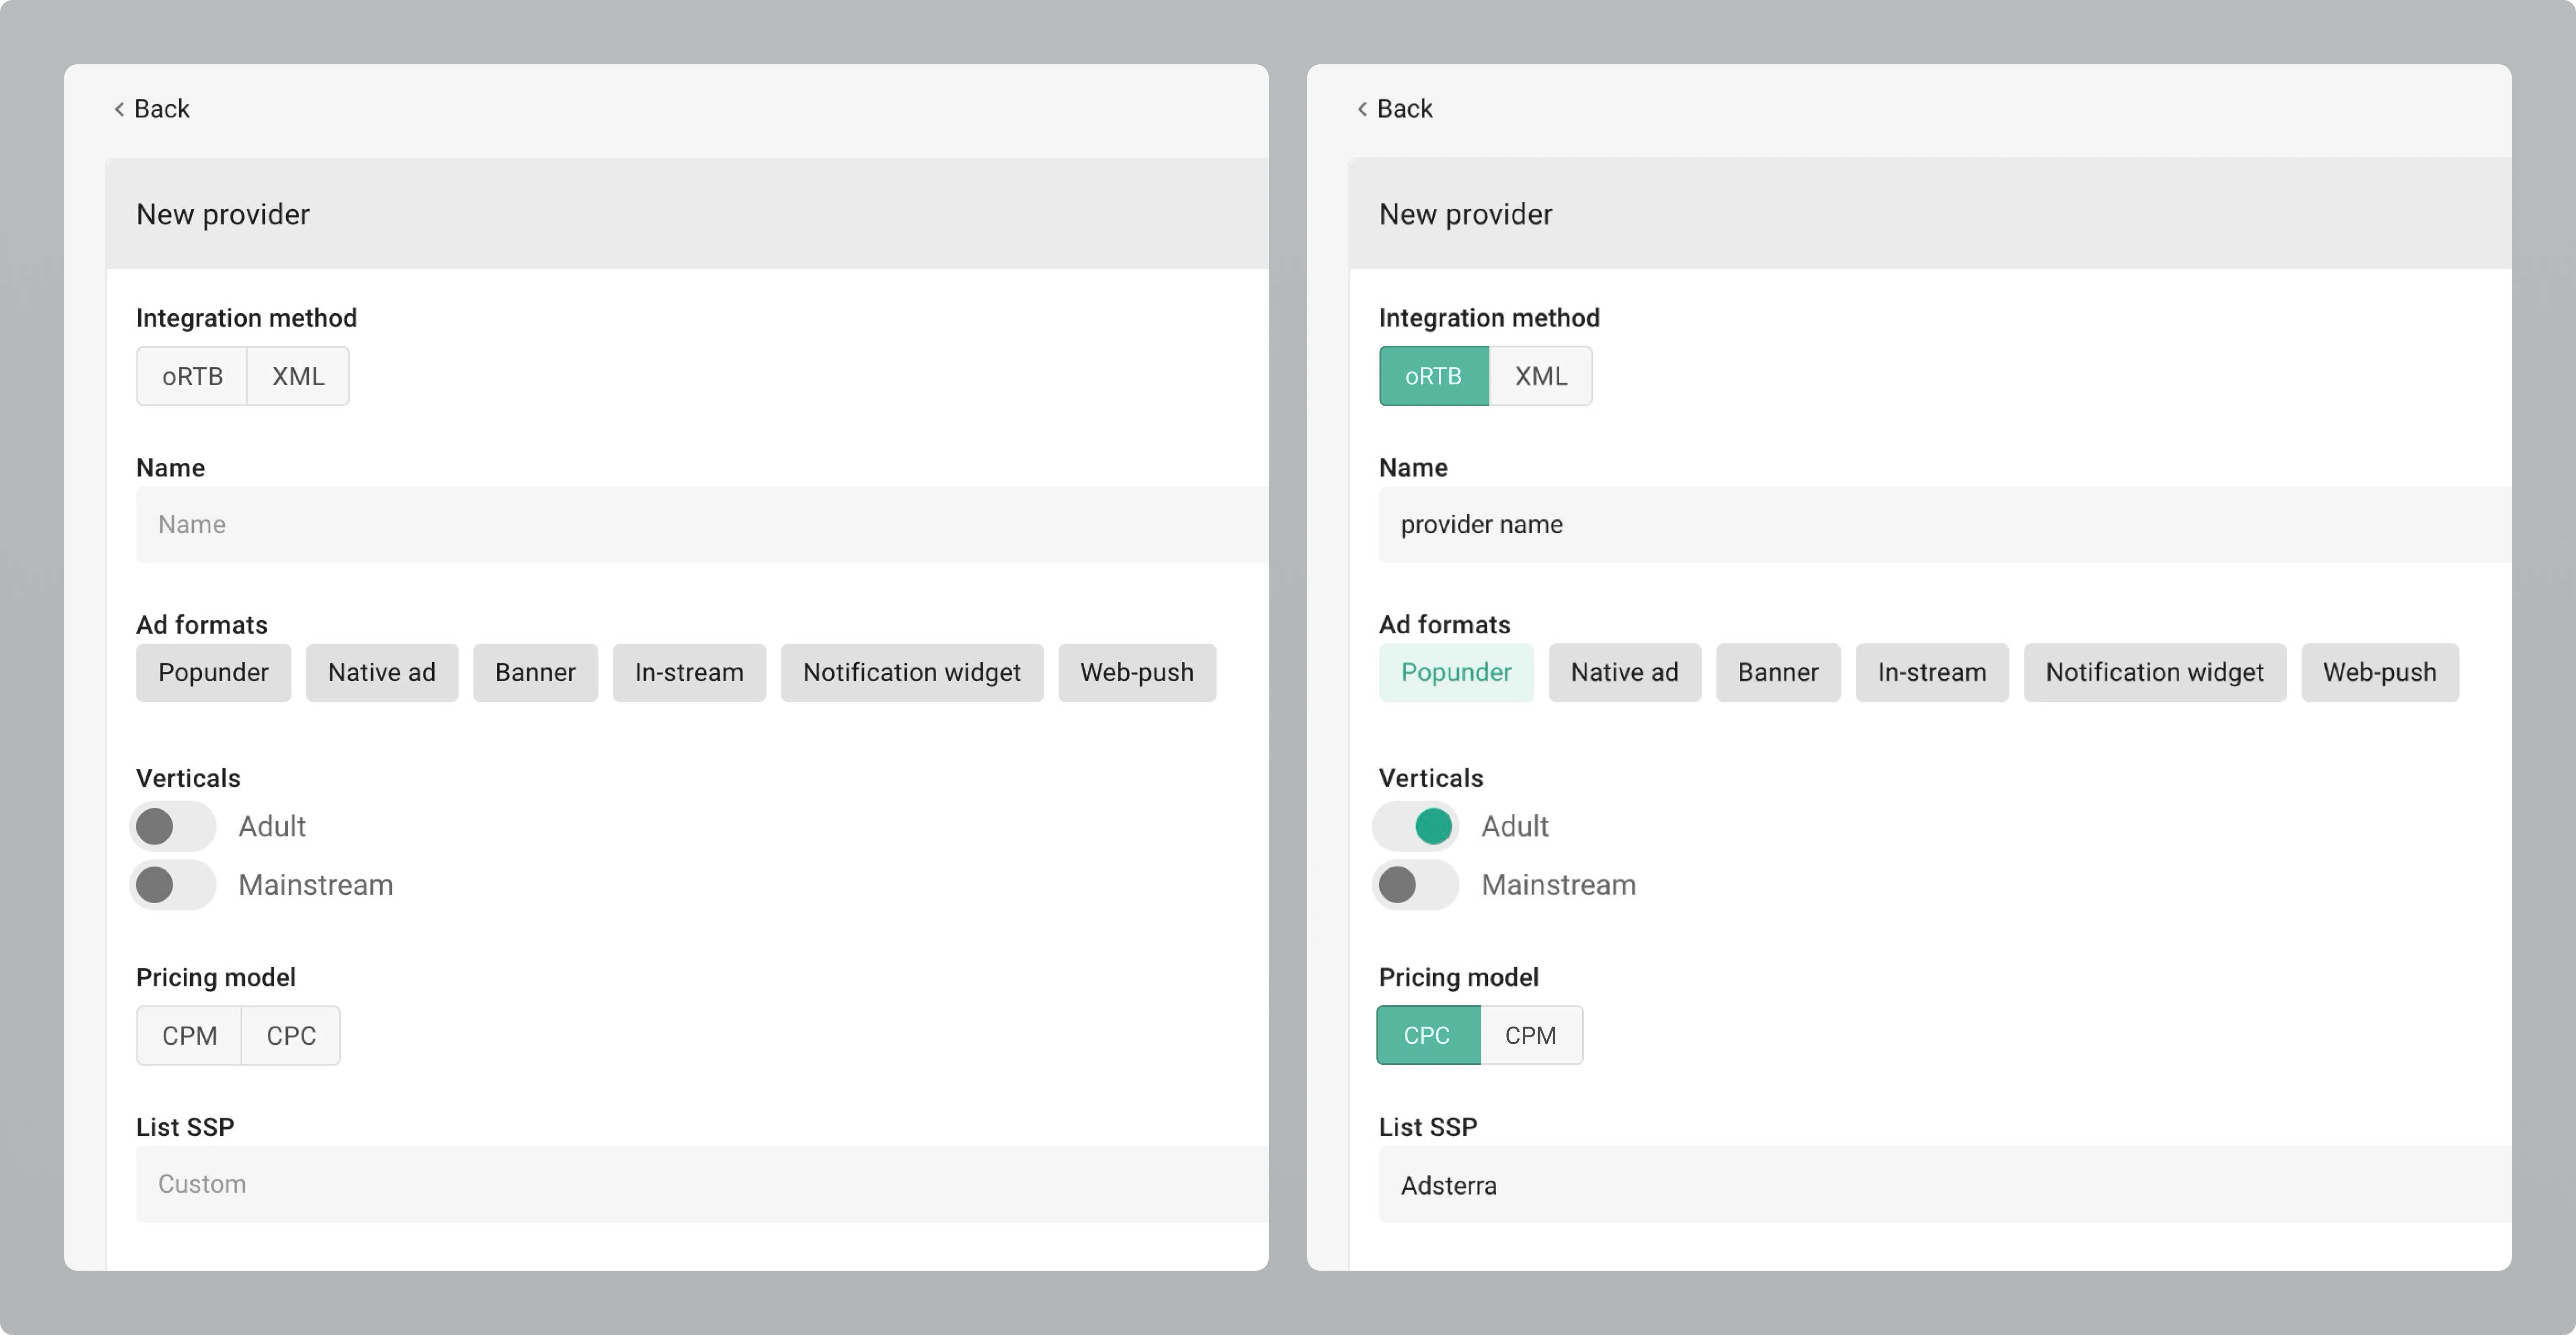
The integration method depends on the method that your traffic source uses:
- Fill in the name;
- Choose the Ad format;
- Choose the vertical — adult or mainstream;
- Select the pricing model;
- Select one or several SSPs depending on your plan. If you want to integrate another provider - please choose the option called Custom (do not choose any SSPs from the list).
- After you have chosen the SSP integration type you will see the request and response examples.
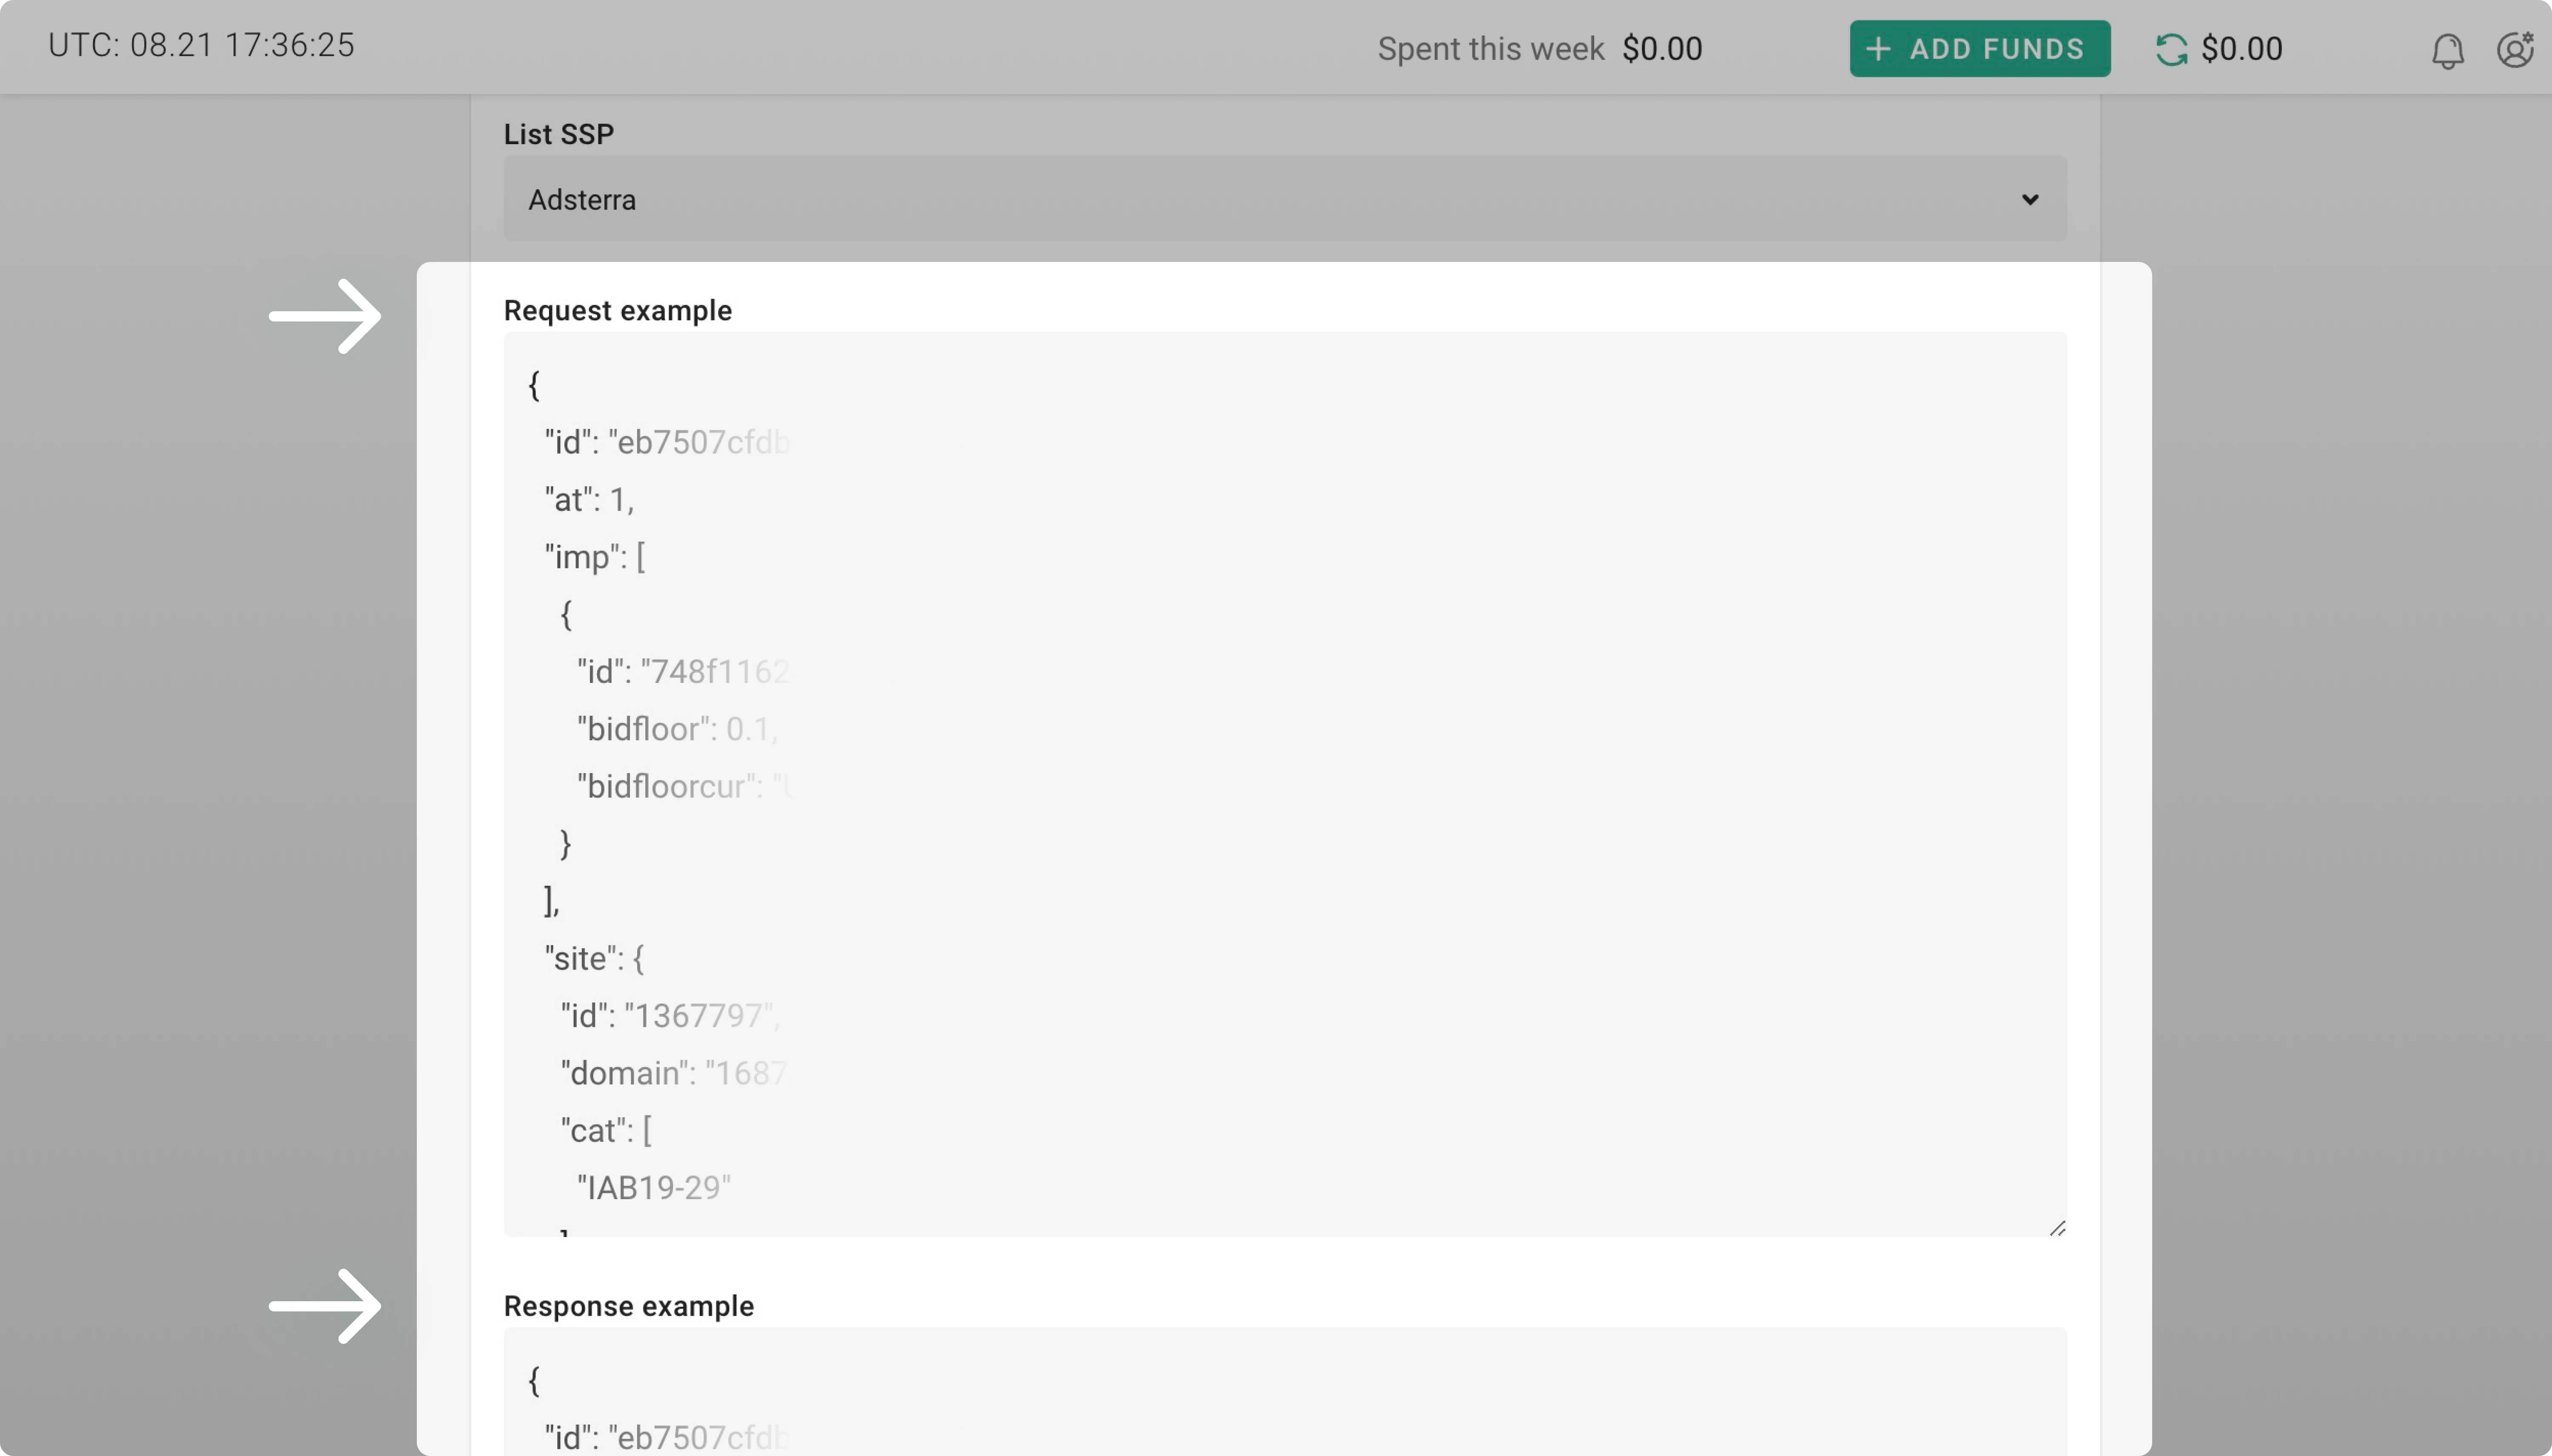 If you are integrating another SSP you will need to paste its request and response examples in the relevant fields.
 - Click the Send Request button
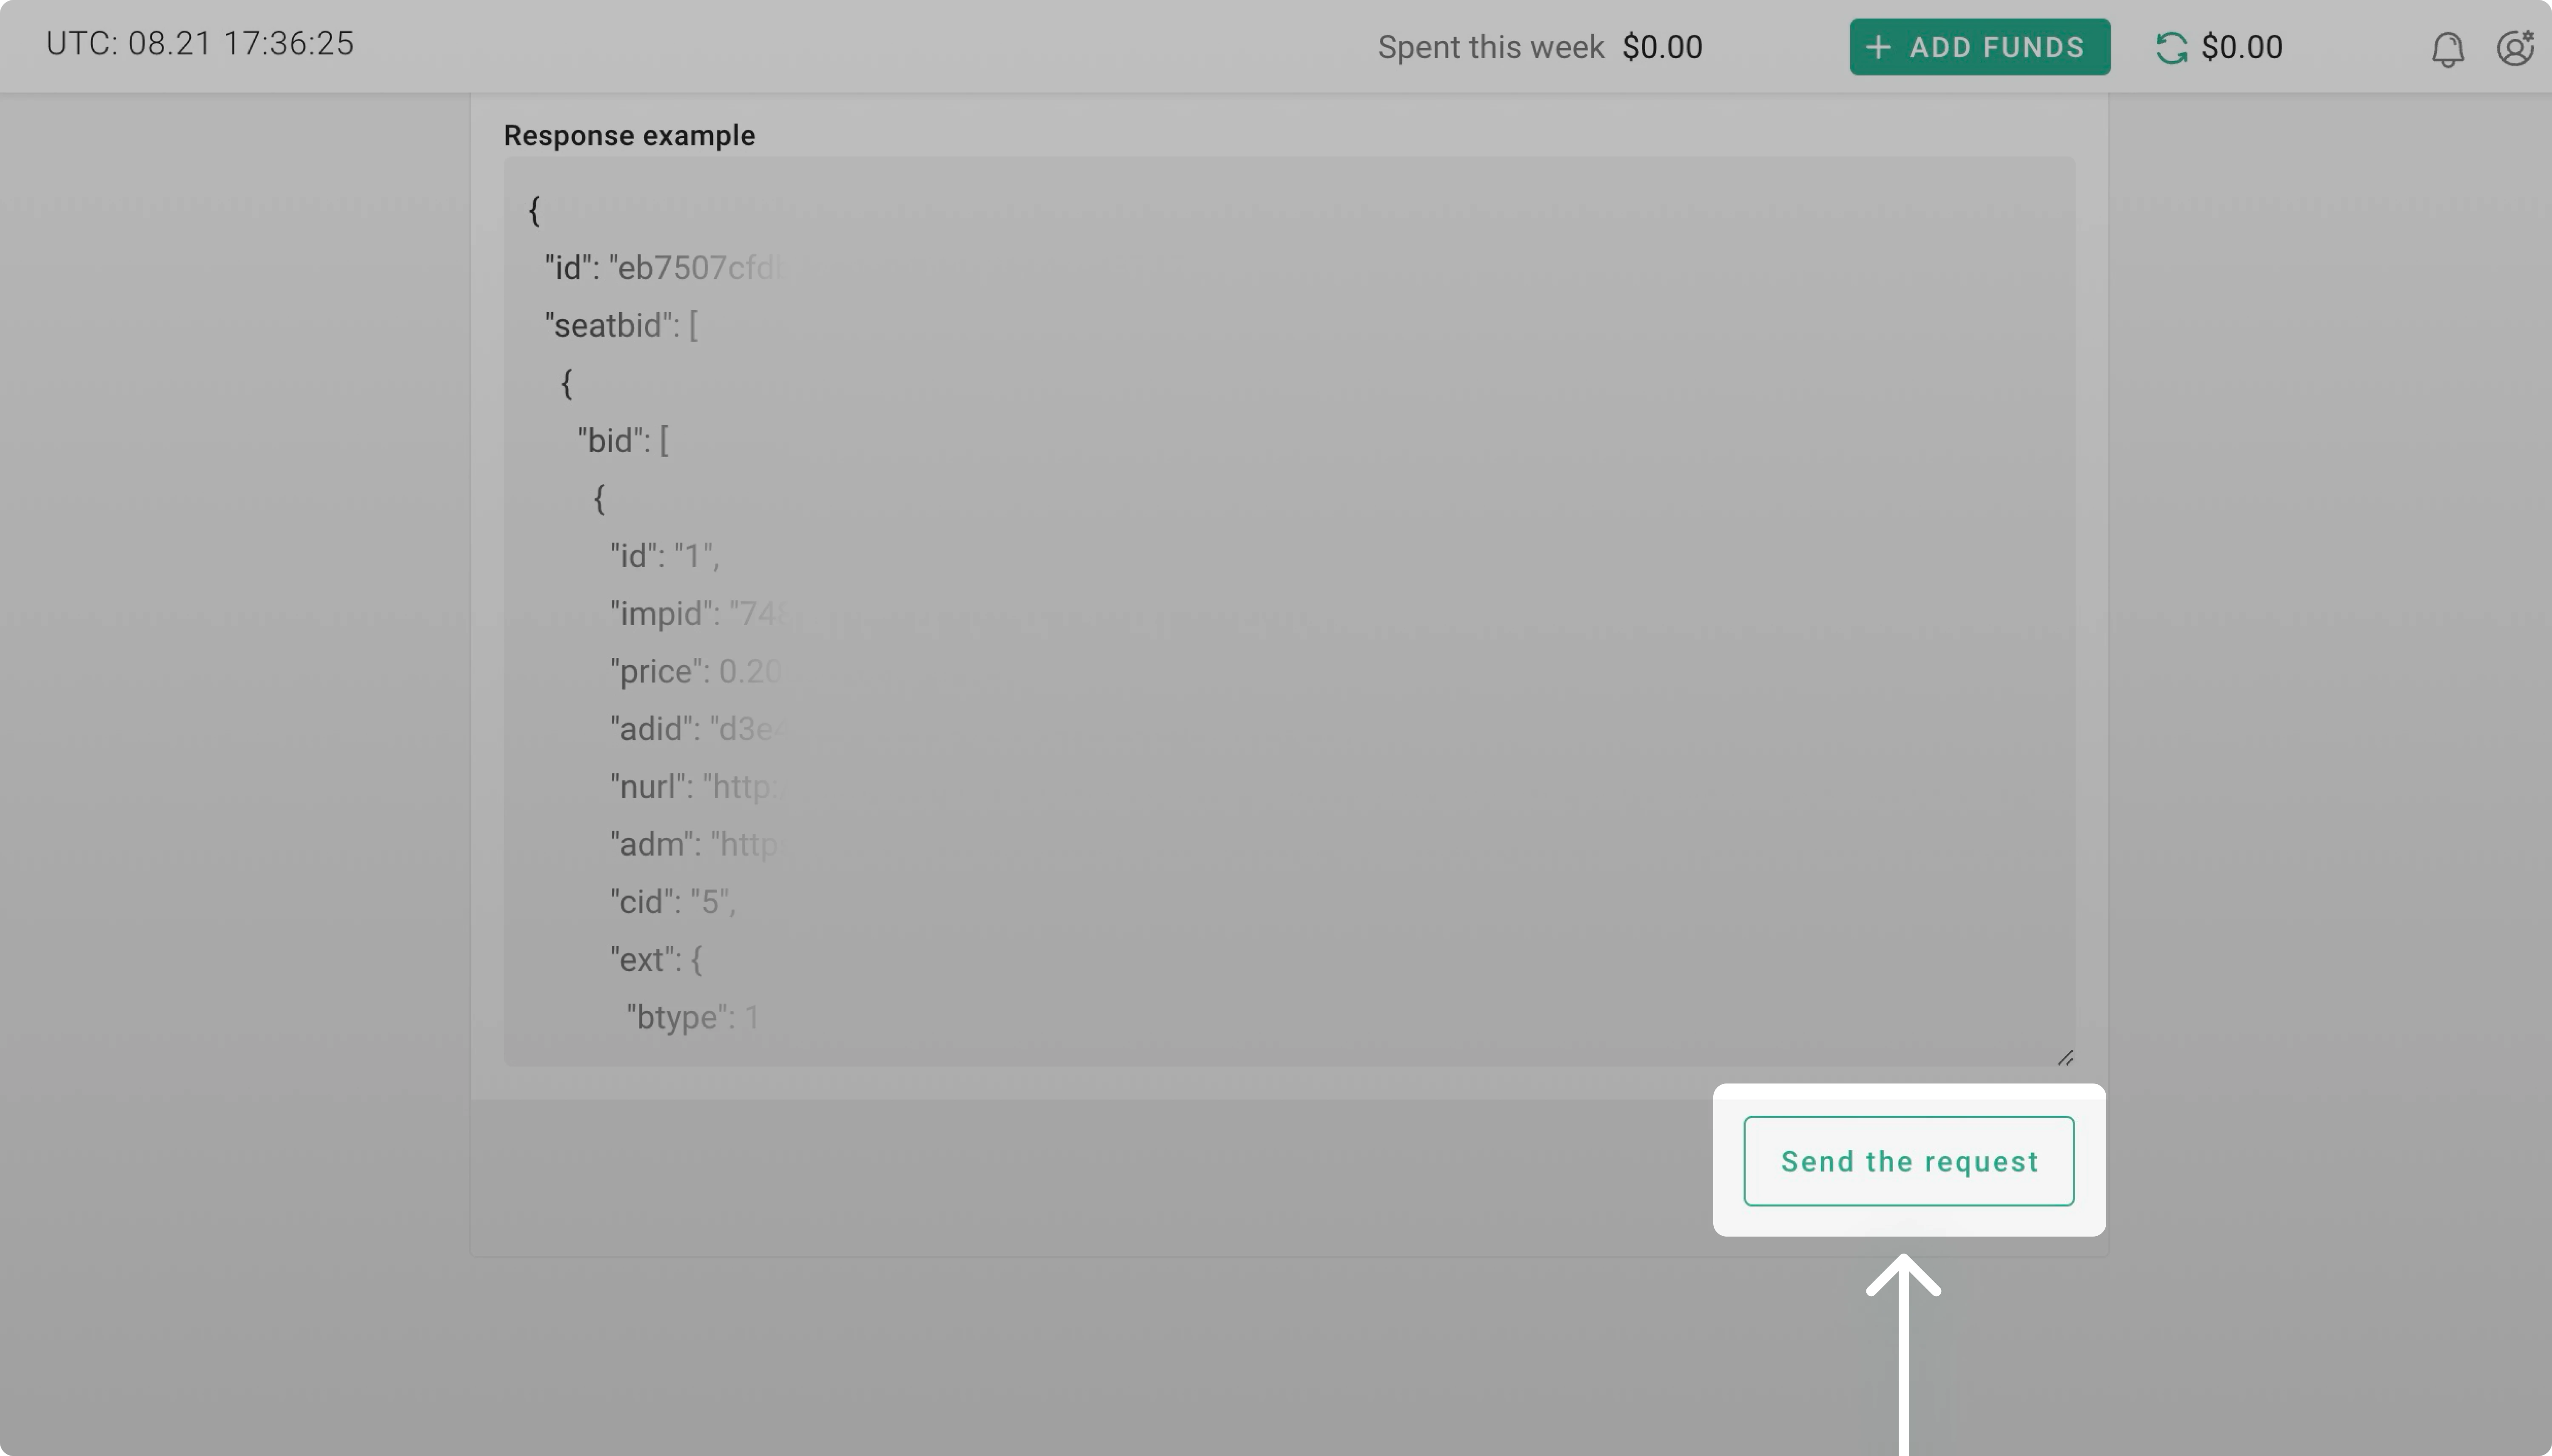
In this step If you have chosen the provider from the list - your request will be considered automatically.
If you are integrating your own SSP — your request will be considered for up to 7 working days.
5. Congrats!
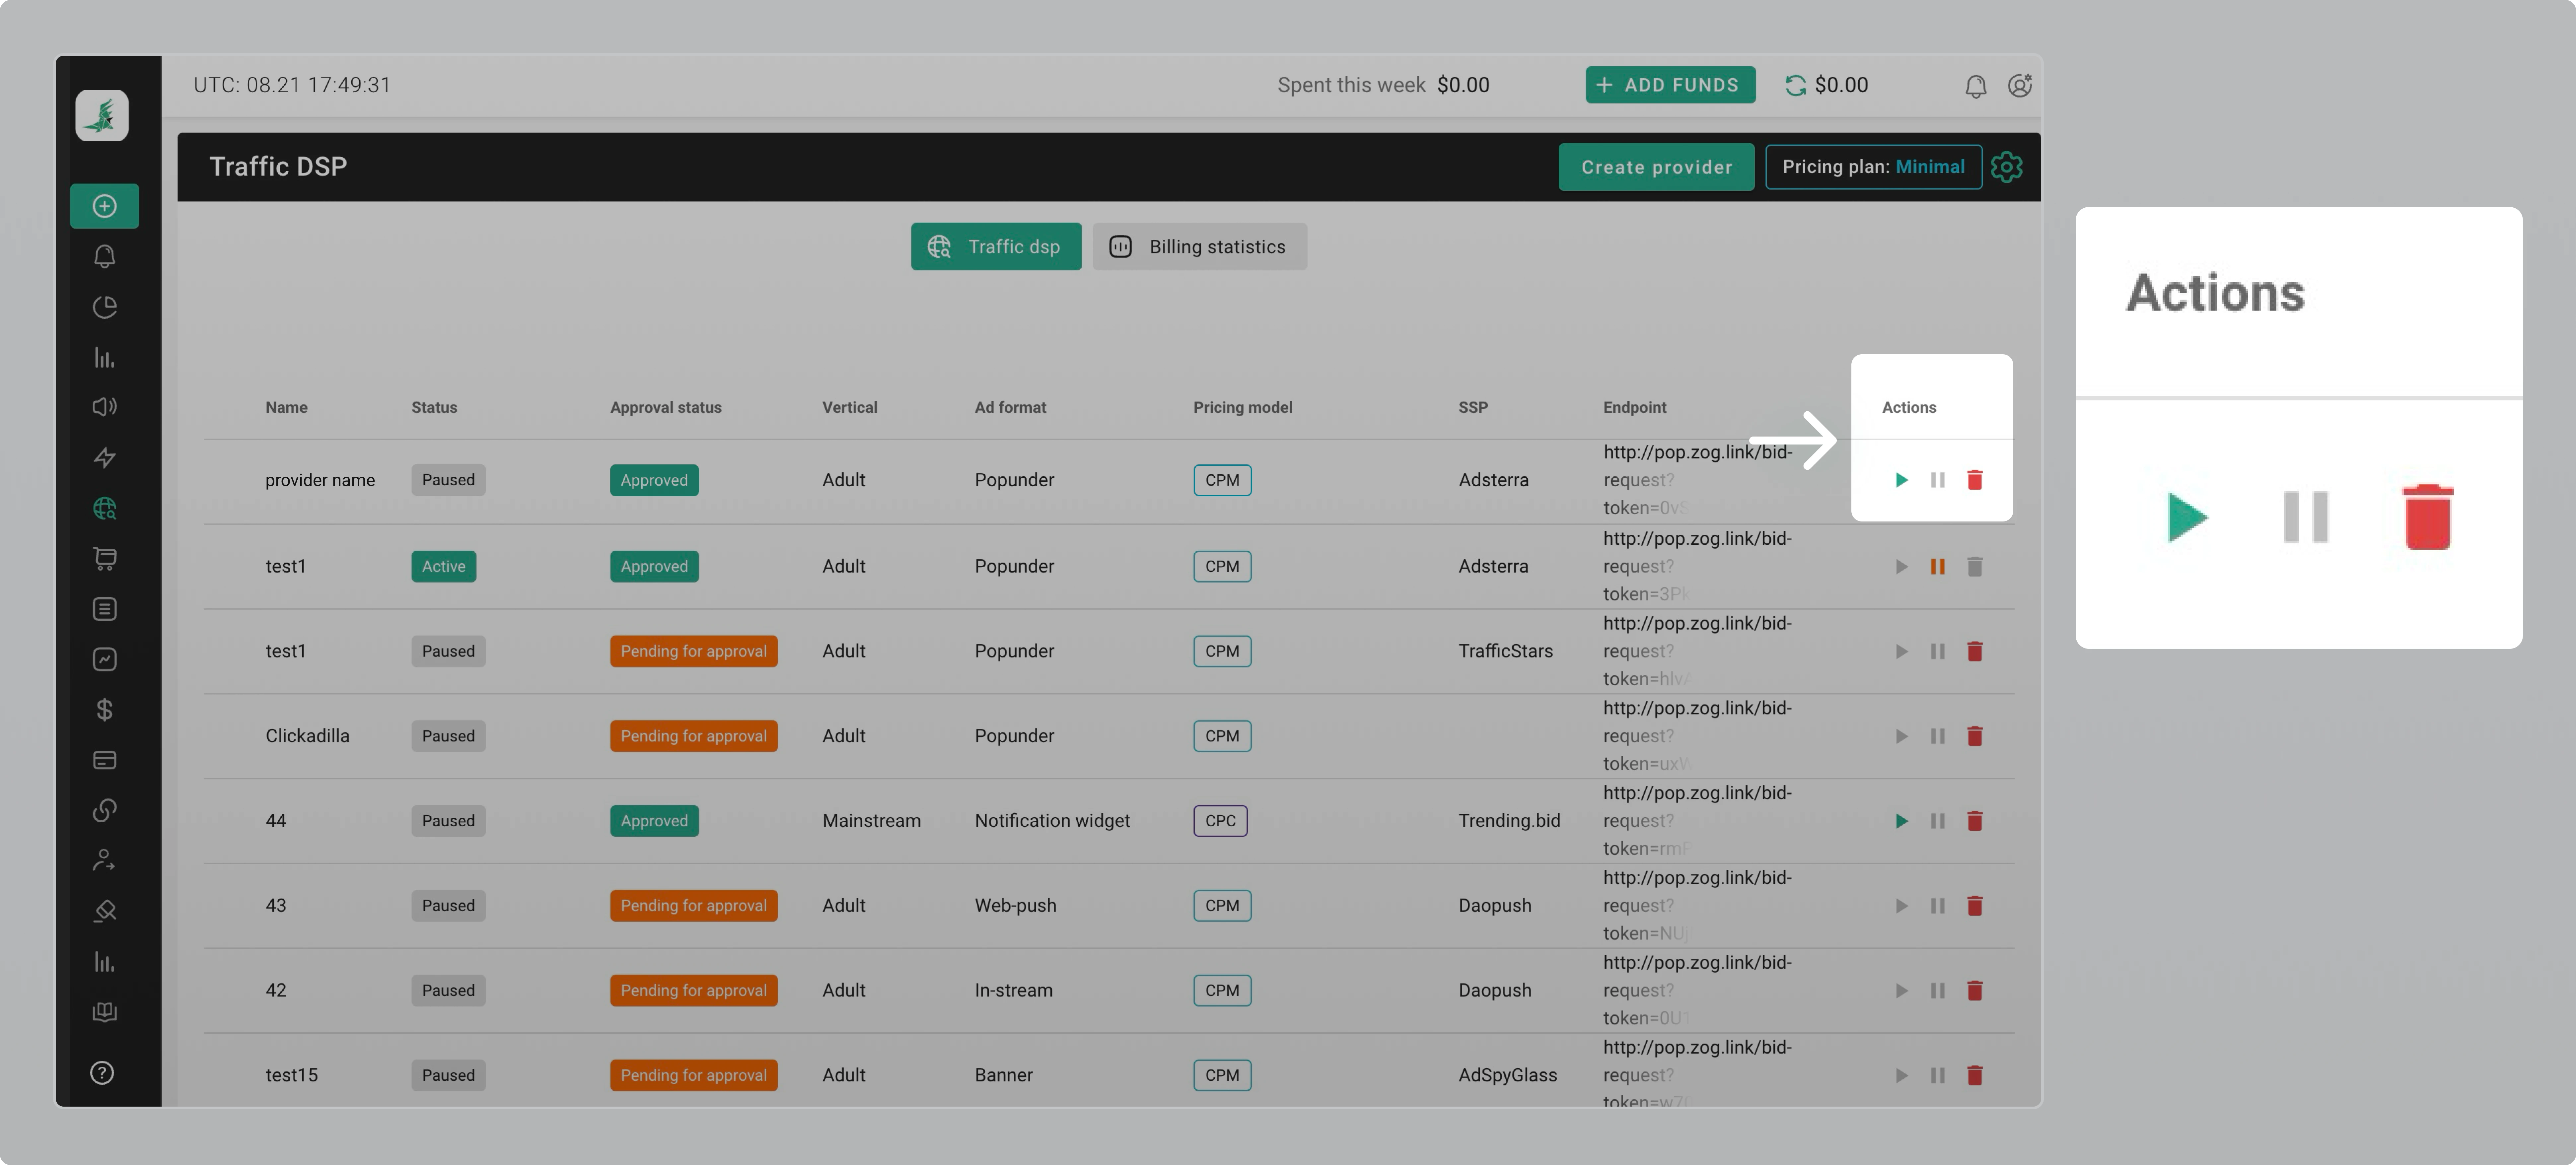
You have integrated an SSP. Now you may activate, pause or delete the traffic source.
To see Actions, scroll the table to the right, if needed:
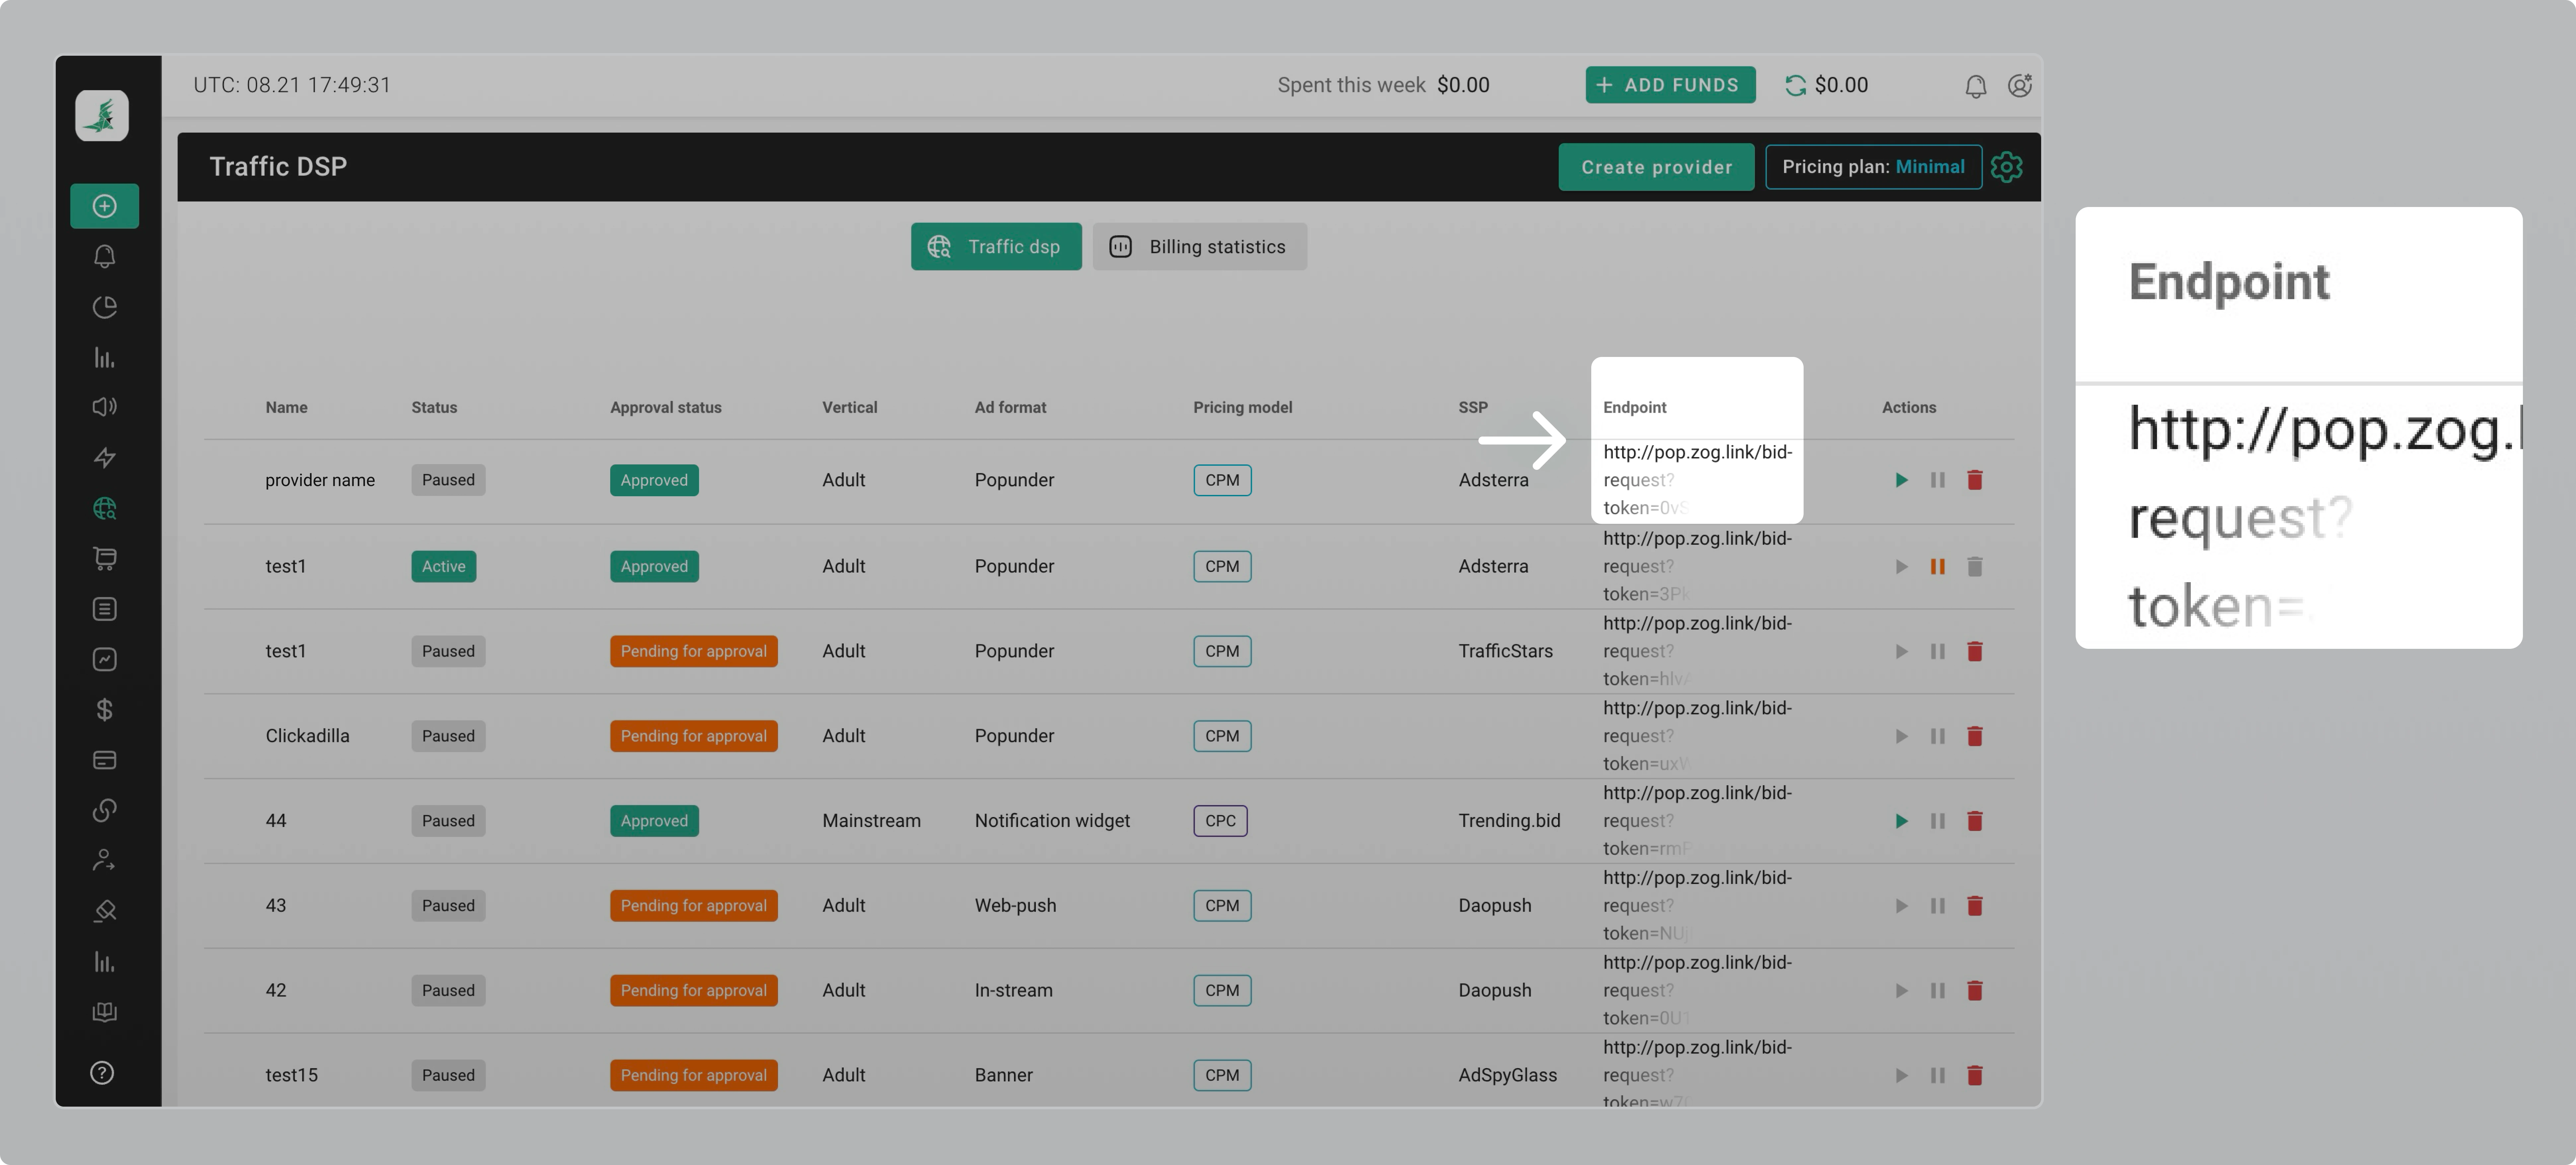
Go to the Traffic DSP section once again. All the providers and data will be there. To start getting traffic, please copy the endpoint and send it to your third-party traffic supplier’s manager to integrate it.
Please, make sure you have enough funds on your third-party traffic source’s balance to get traffic.
* ClickAdilla’s Traffic DSP allows users to buy traffic from third-party traffic suppliers without paying for the margin. At ClickAdilla you pay only for the user-friendly software and useful tools.
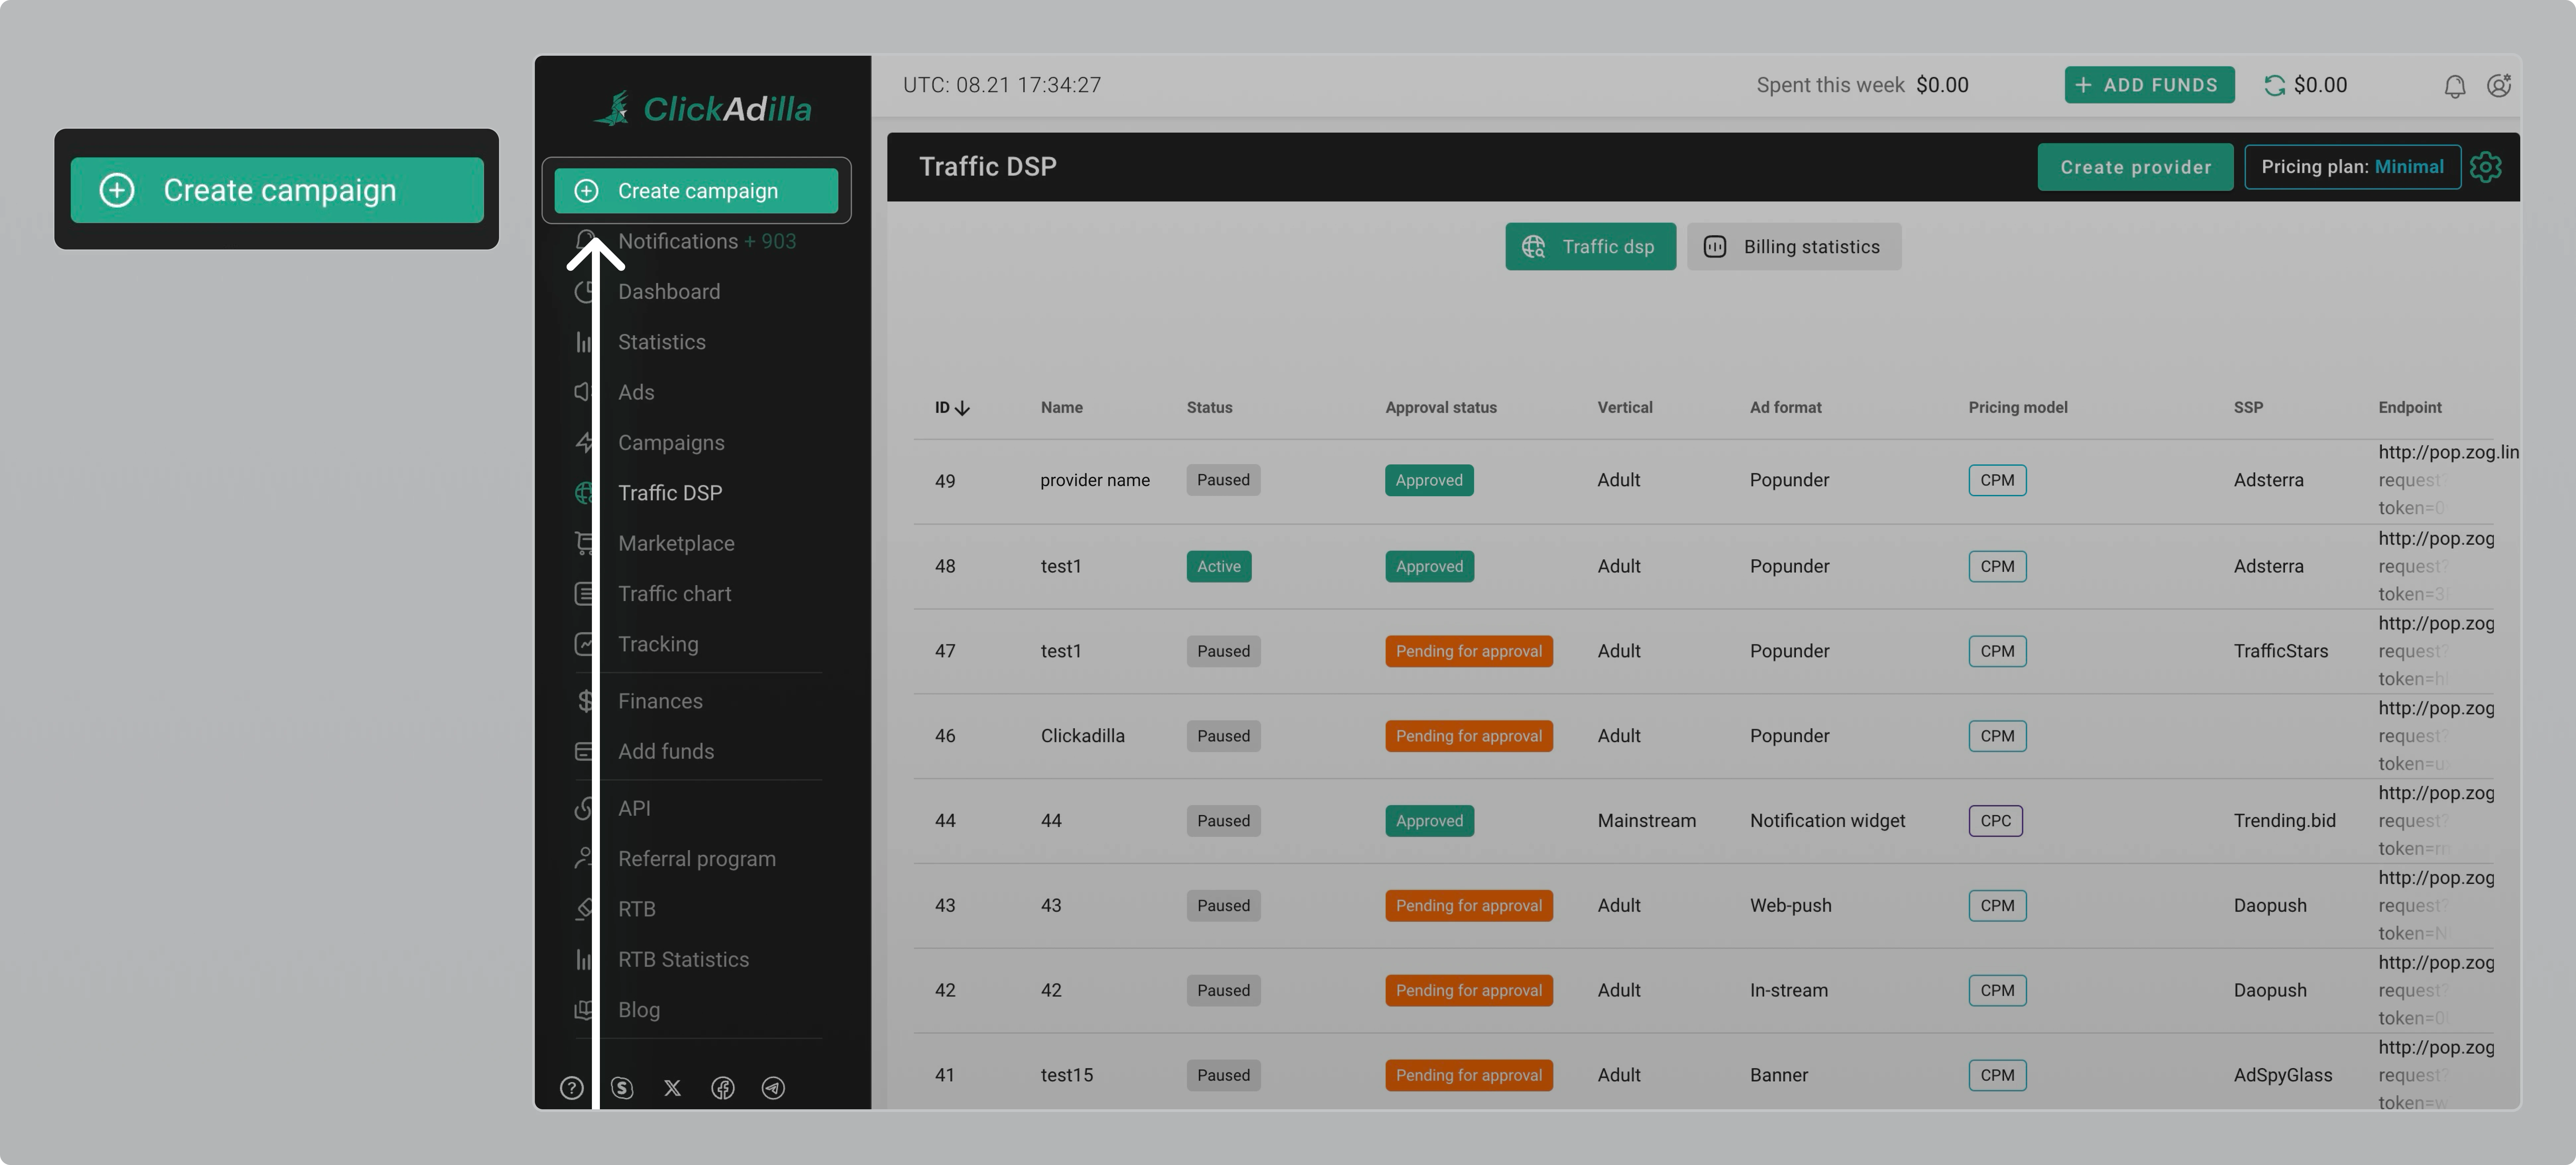
6. Create a campaign
After everything is done, you may create a campaign at the Create campaign page:
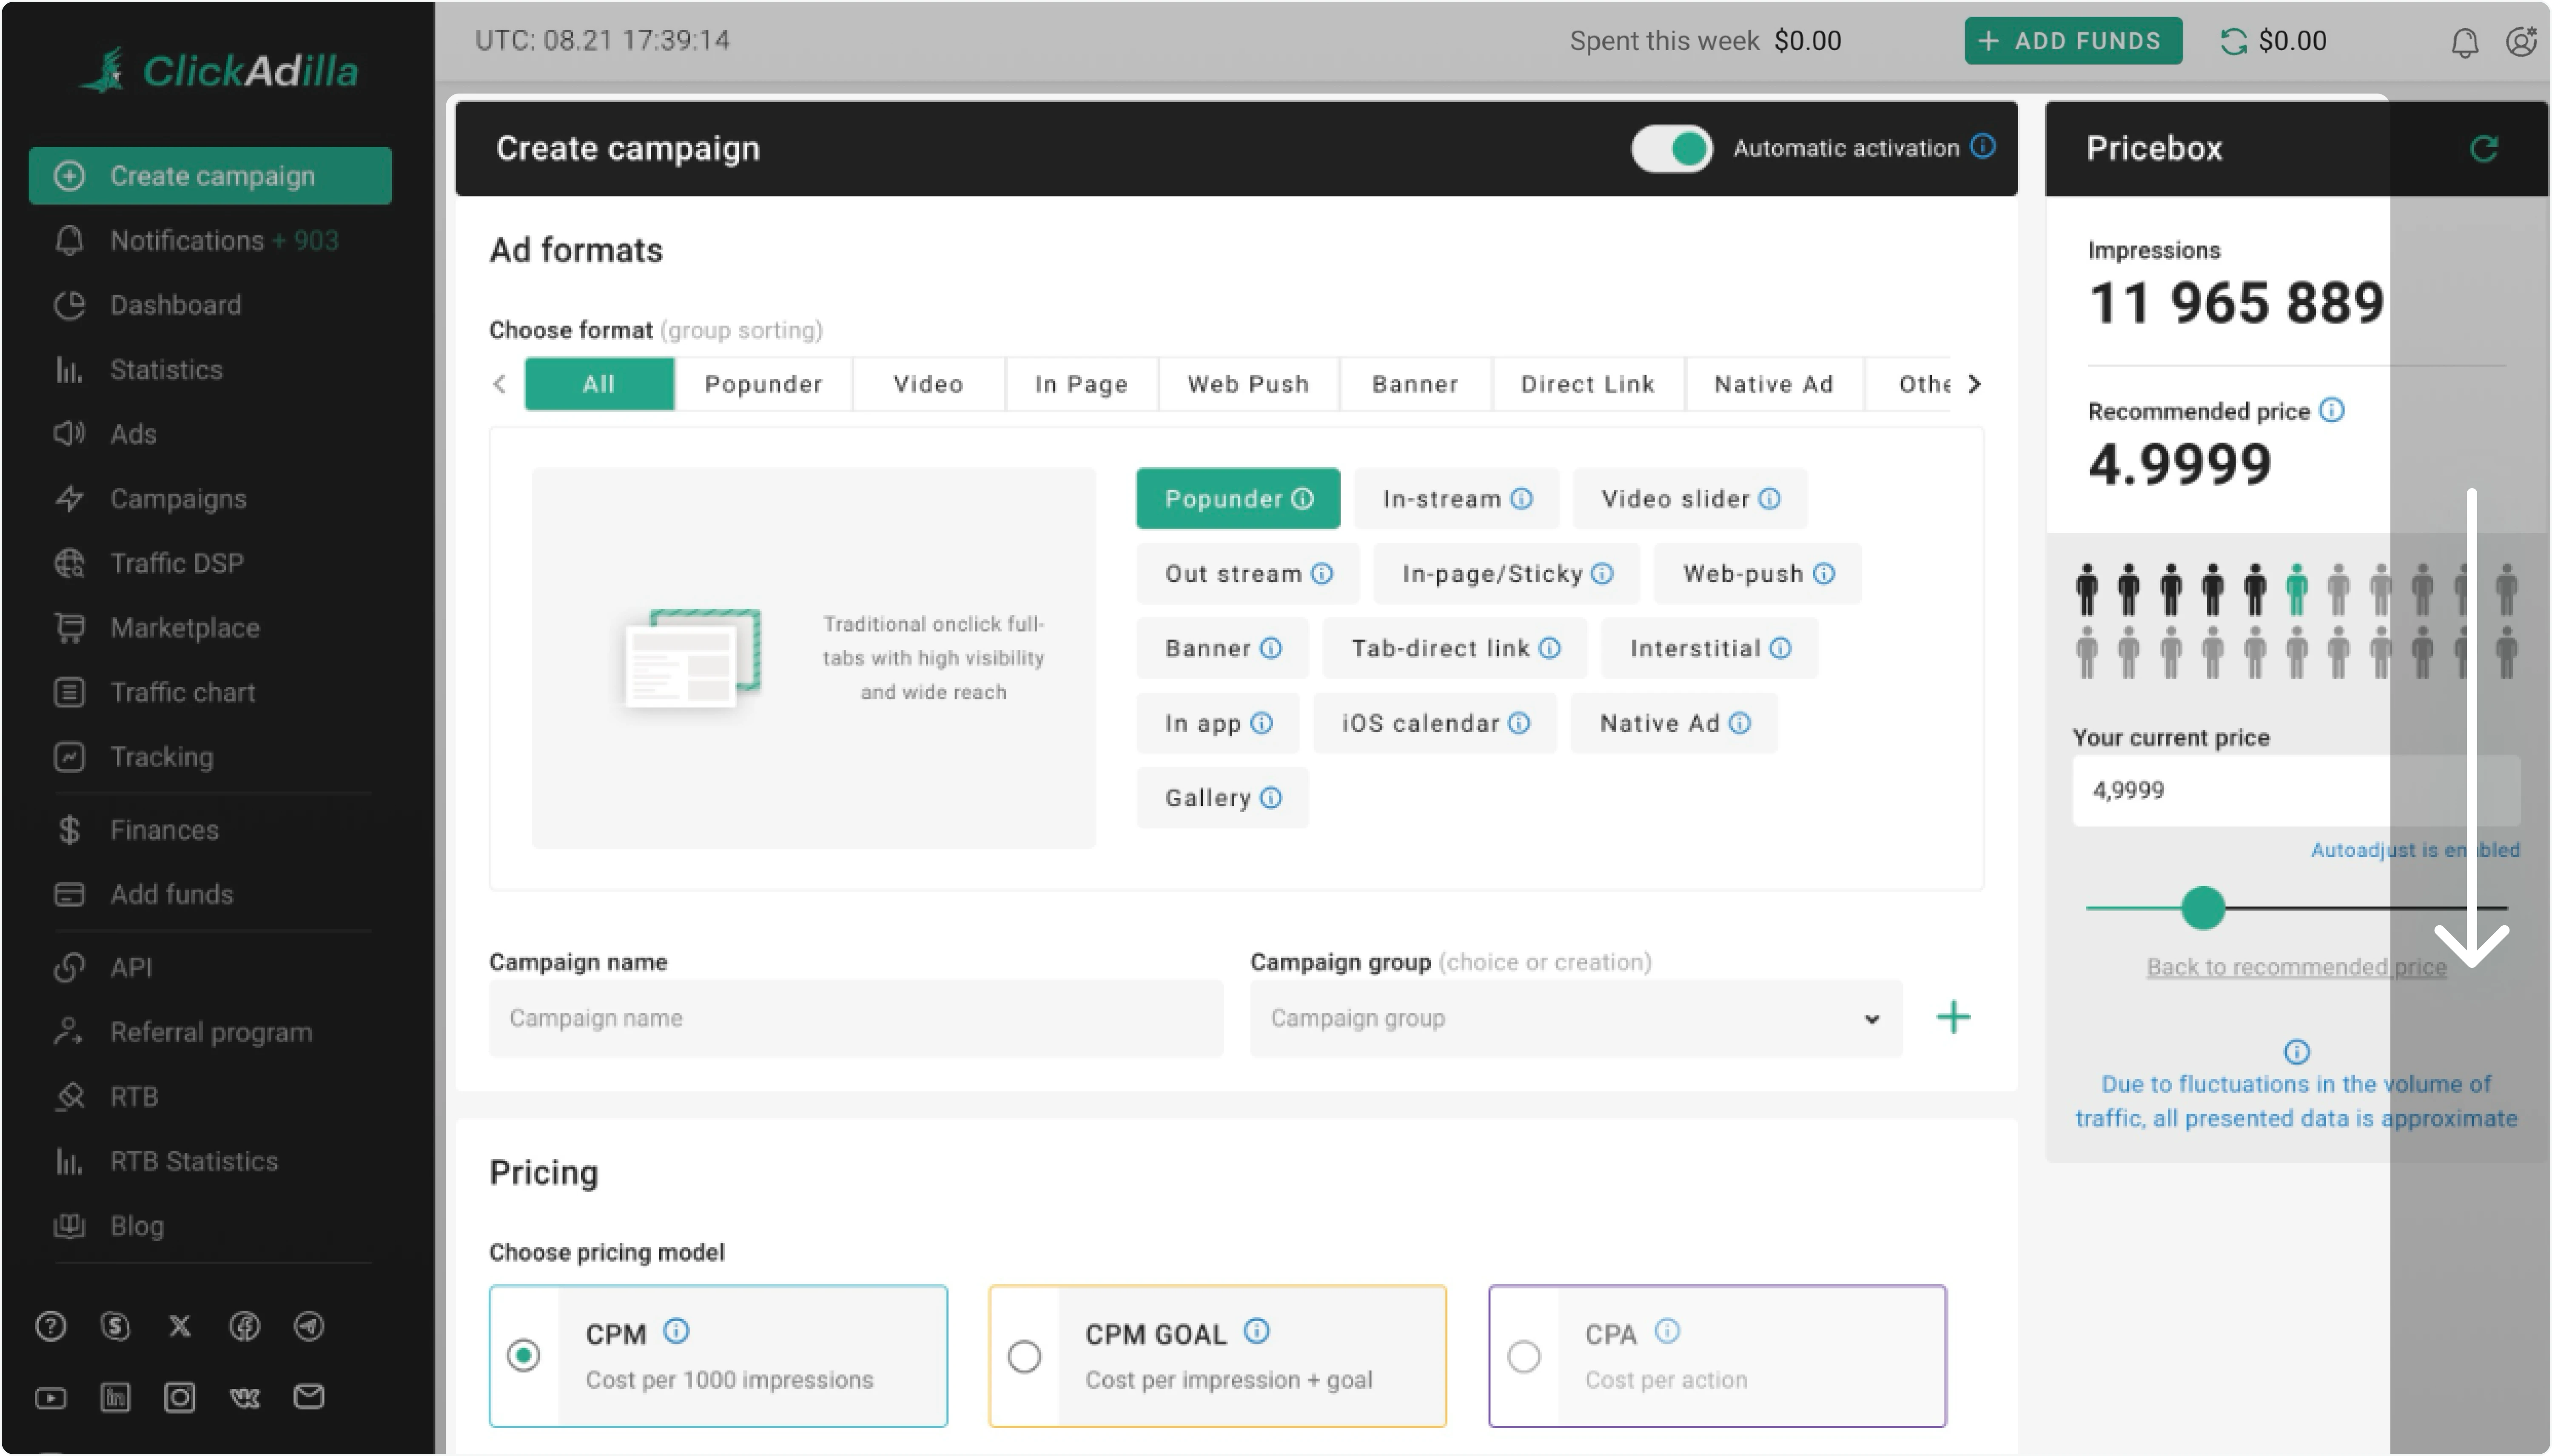
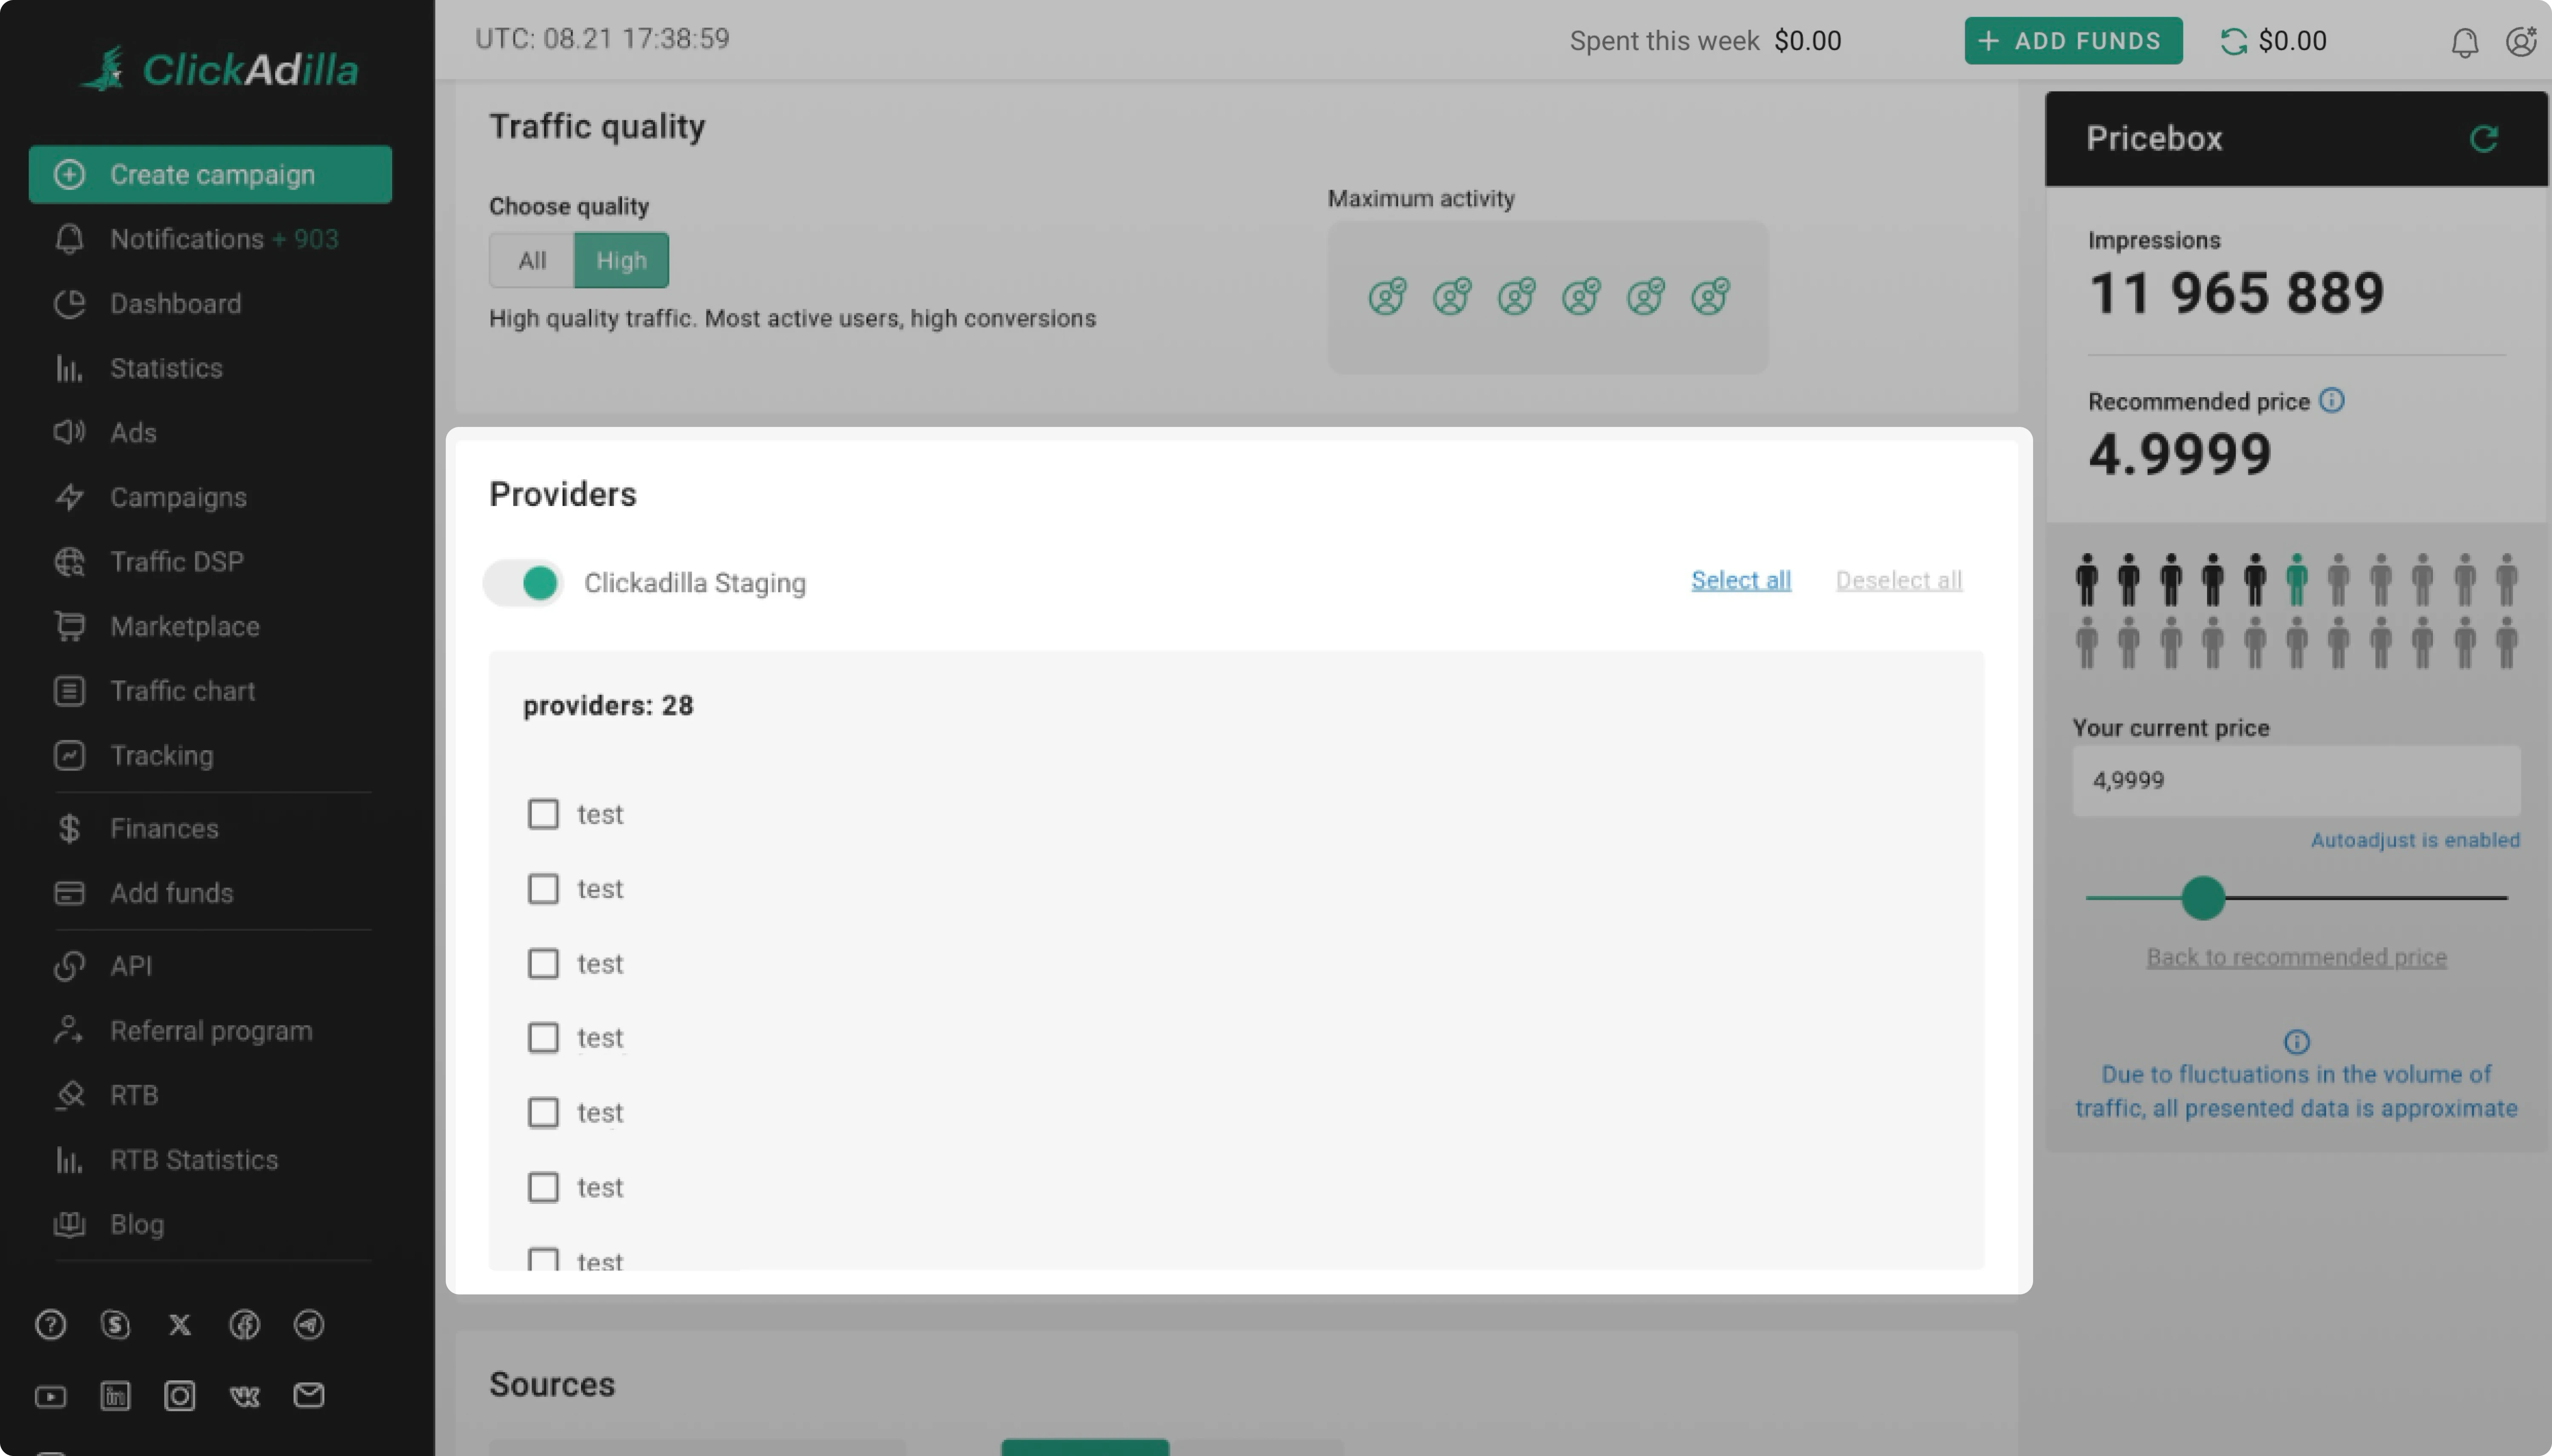
Scroll down Create campaign page until Providers section
When creating a campaign you will see all integrated providers. Depending on your plan you may enable or disable ClickAdilla’s traffic. Here you may also select the providers you need for the campaign.