

Discover how the seamless integration between ClickAdilla and Voluum revolutionizes campaign management. Gain real-time insights, adjust bids directly, and optimize your advertising strategies effortlessly. Join over 16,000 clients benefiting from enhanced analytics and streamlined workflows.
We’re thrilled to announce a major milestone in our journey — ClickAdilla has officially completed its full integration with Voluum, one of the industry's leading tracking systems. This integration is a significant achievement, and we're incredibly proud of the hard work our team of managers and developers has put into making this a reality.
For those who may not be familiar, Voluum is an advanced, real-time SaaS analytics platform designed for performance marketers and self-serve advertisers. It enables users to track the progress and profitability of their online campaigns with precision, thanks to its powerful database technology that processes billions of real-time data requests in the blink of an eye.
ClickAdilla, on the other hand, is a leading self-serve ad network platform that delivers high-quality traffic across all major verticals. Every day, we provide over 4.5 billion impressions to users in more than 240 GEOs, including Tier 1 regions, helping over 16,000 clients achieve their advertising goals.
With this integration, you can now manage your ClickAdilla campaigns directly from Voluum, taking advantage of its extensive reporting and optimization tools. This blog post will guide you through the process of setting up and utilizing this powerful integration.
Why Is This Integration a Game-Changer?
The full API integration between ClickAdilla and Voluum offers several key benefits:
- Real-time cost synchronization — automatically sync campaign costs, ensuring you always have the most accurate data;
- Bid Management — adjust your bids directly from the Voluum interface, optimizing performance with ease;
- Campaign status monitoring — keep a close eye on the status of your campaigns directly from Voluum;
- Campaign management — pause or restore campaigns instantly with just a click;
- Rule creation — set up rules in Voluum to optimize your campaigns based on the data flowing in from ClickAdilla.
Getting Started: What You Need
Before diving into the setup process, make sure you have the following:
- Active Voluum Account: You’ll need to be logged into your Voluum account.
- Active ClickAdilla Account: Ensure your ClickAdilla account is up and running.
- ClickAdilla API Token: This token authenticates Voluum's requests in your ClickAdilla account.
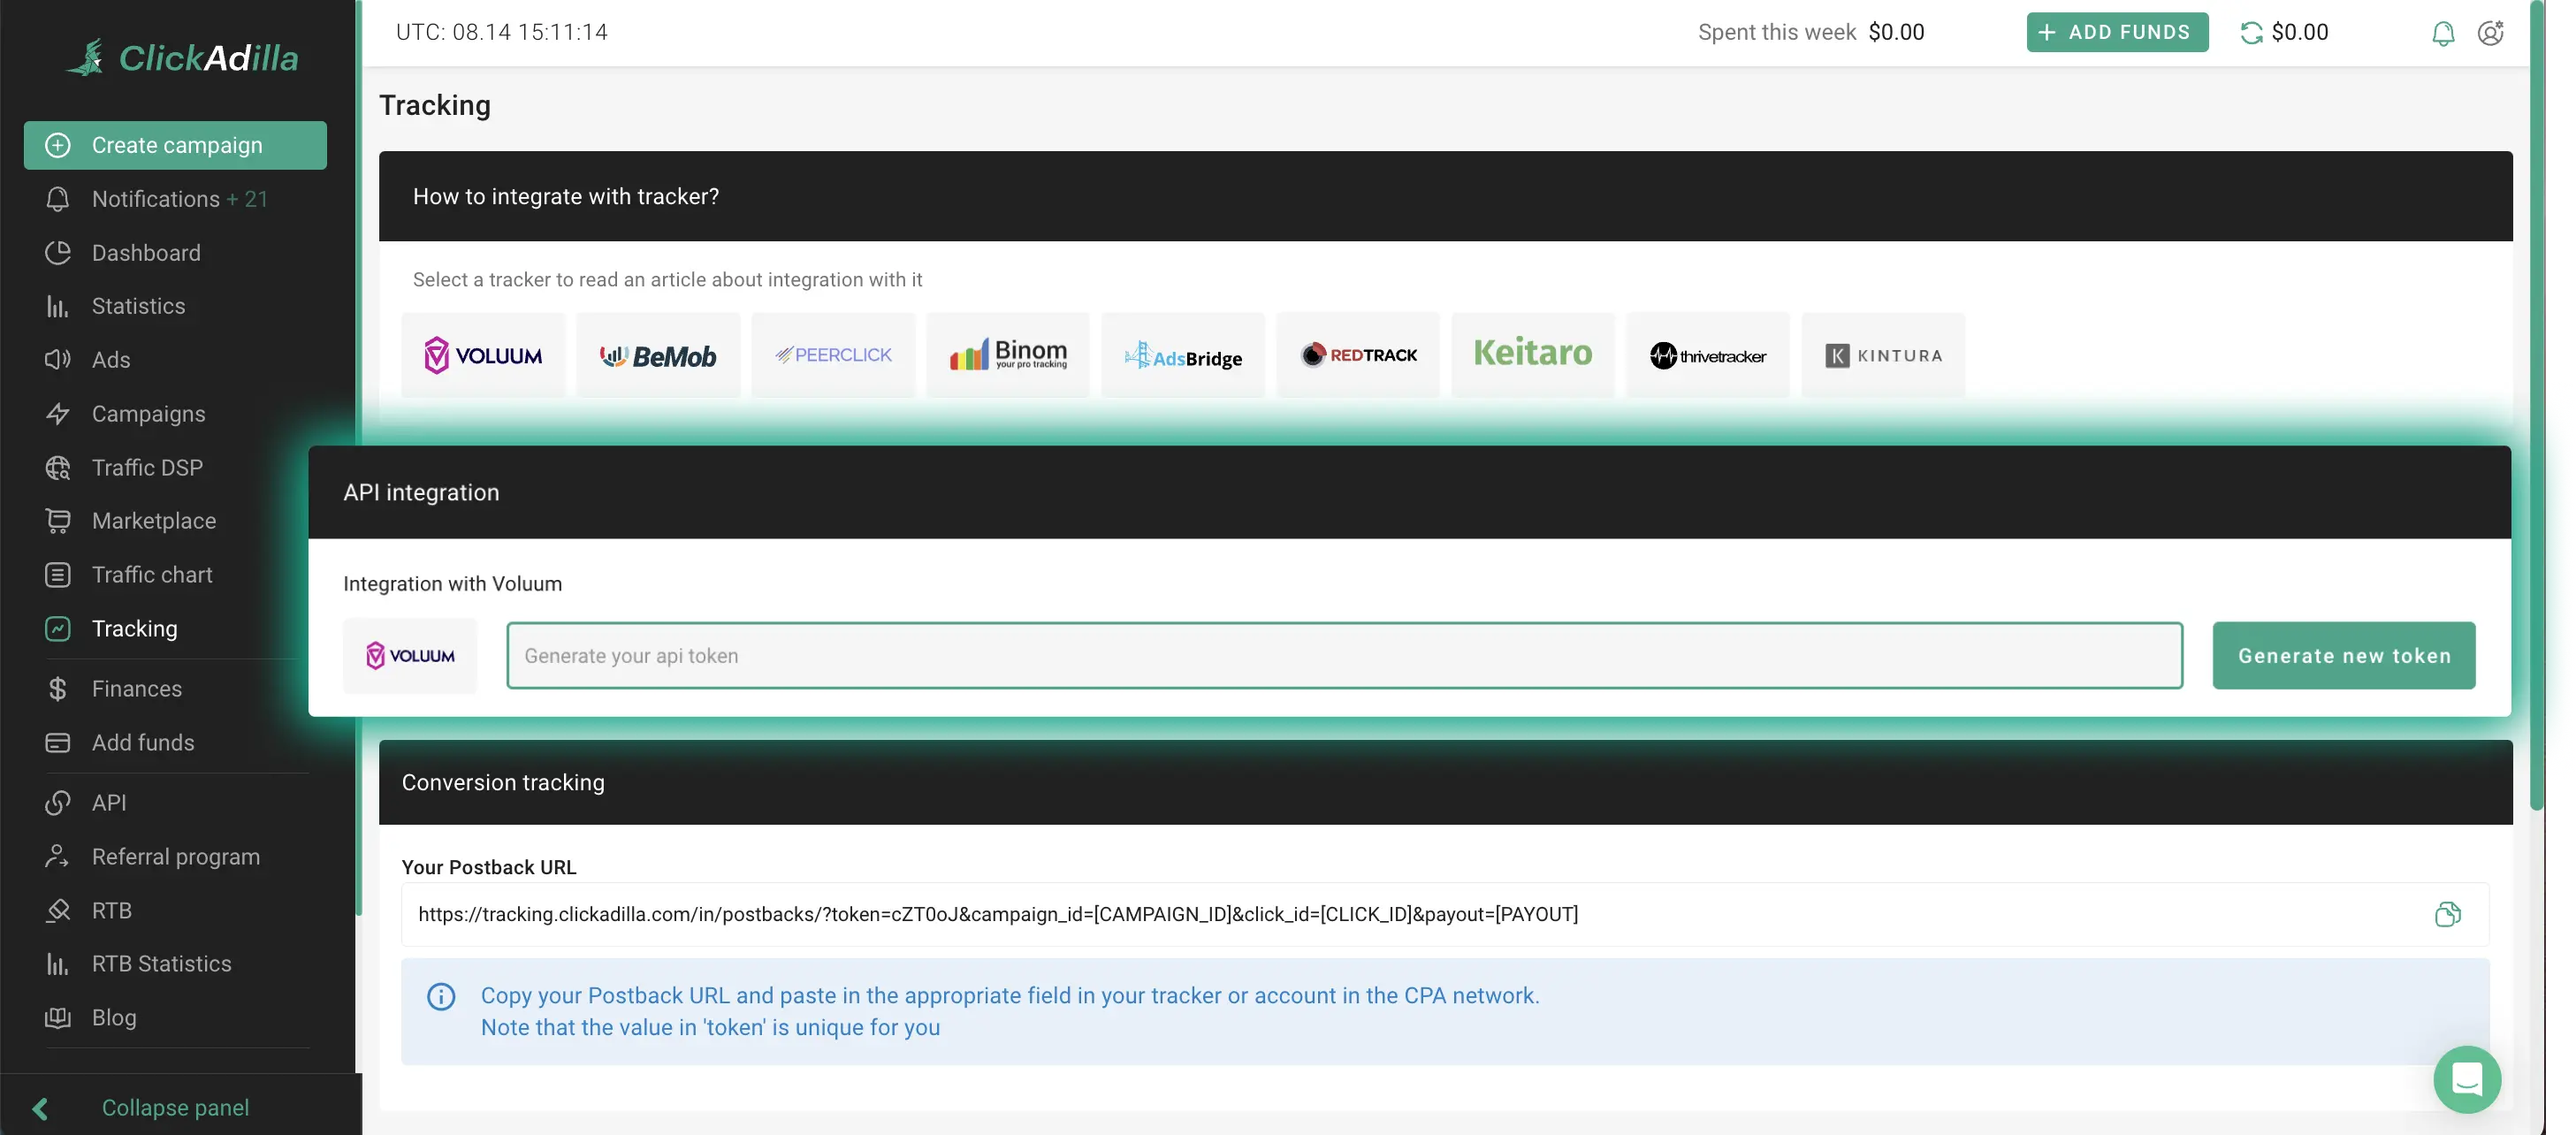
To obtain your API key, follow these steps:
- Log in to your ClickAdilla account.
- Navigate to the Tracking tab.
- Generate and copy your API key.
With these essentials in place, you’re ready to start the integration process!
Step 1: Setting Up the Integration
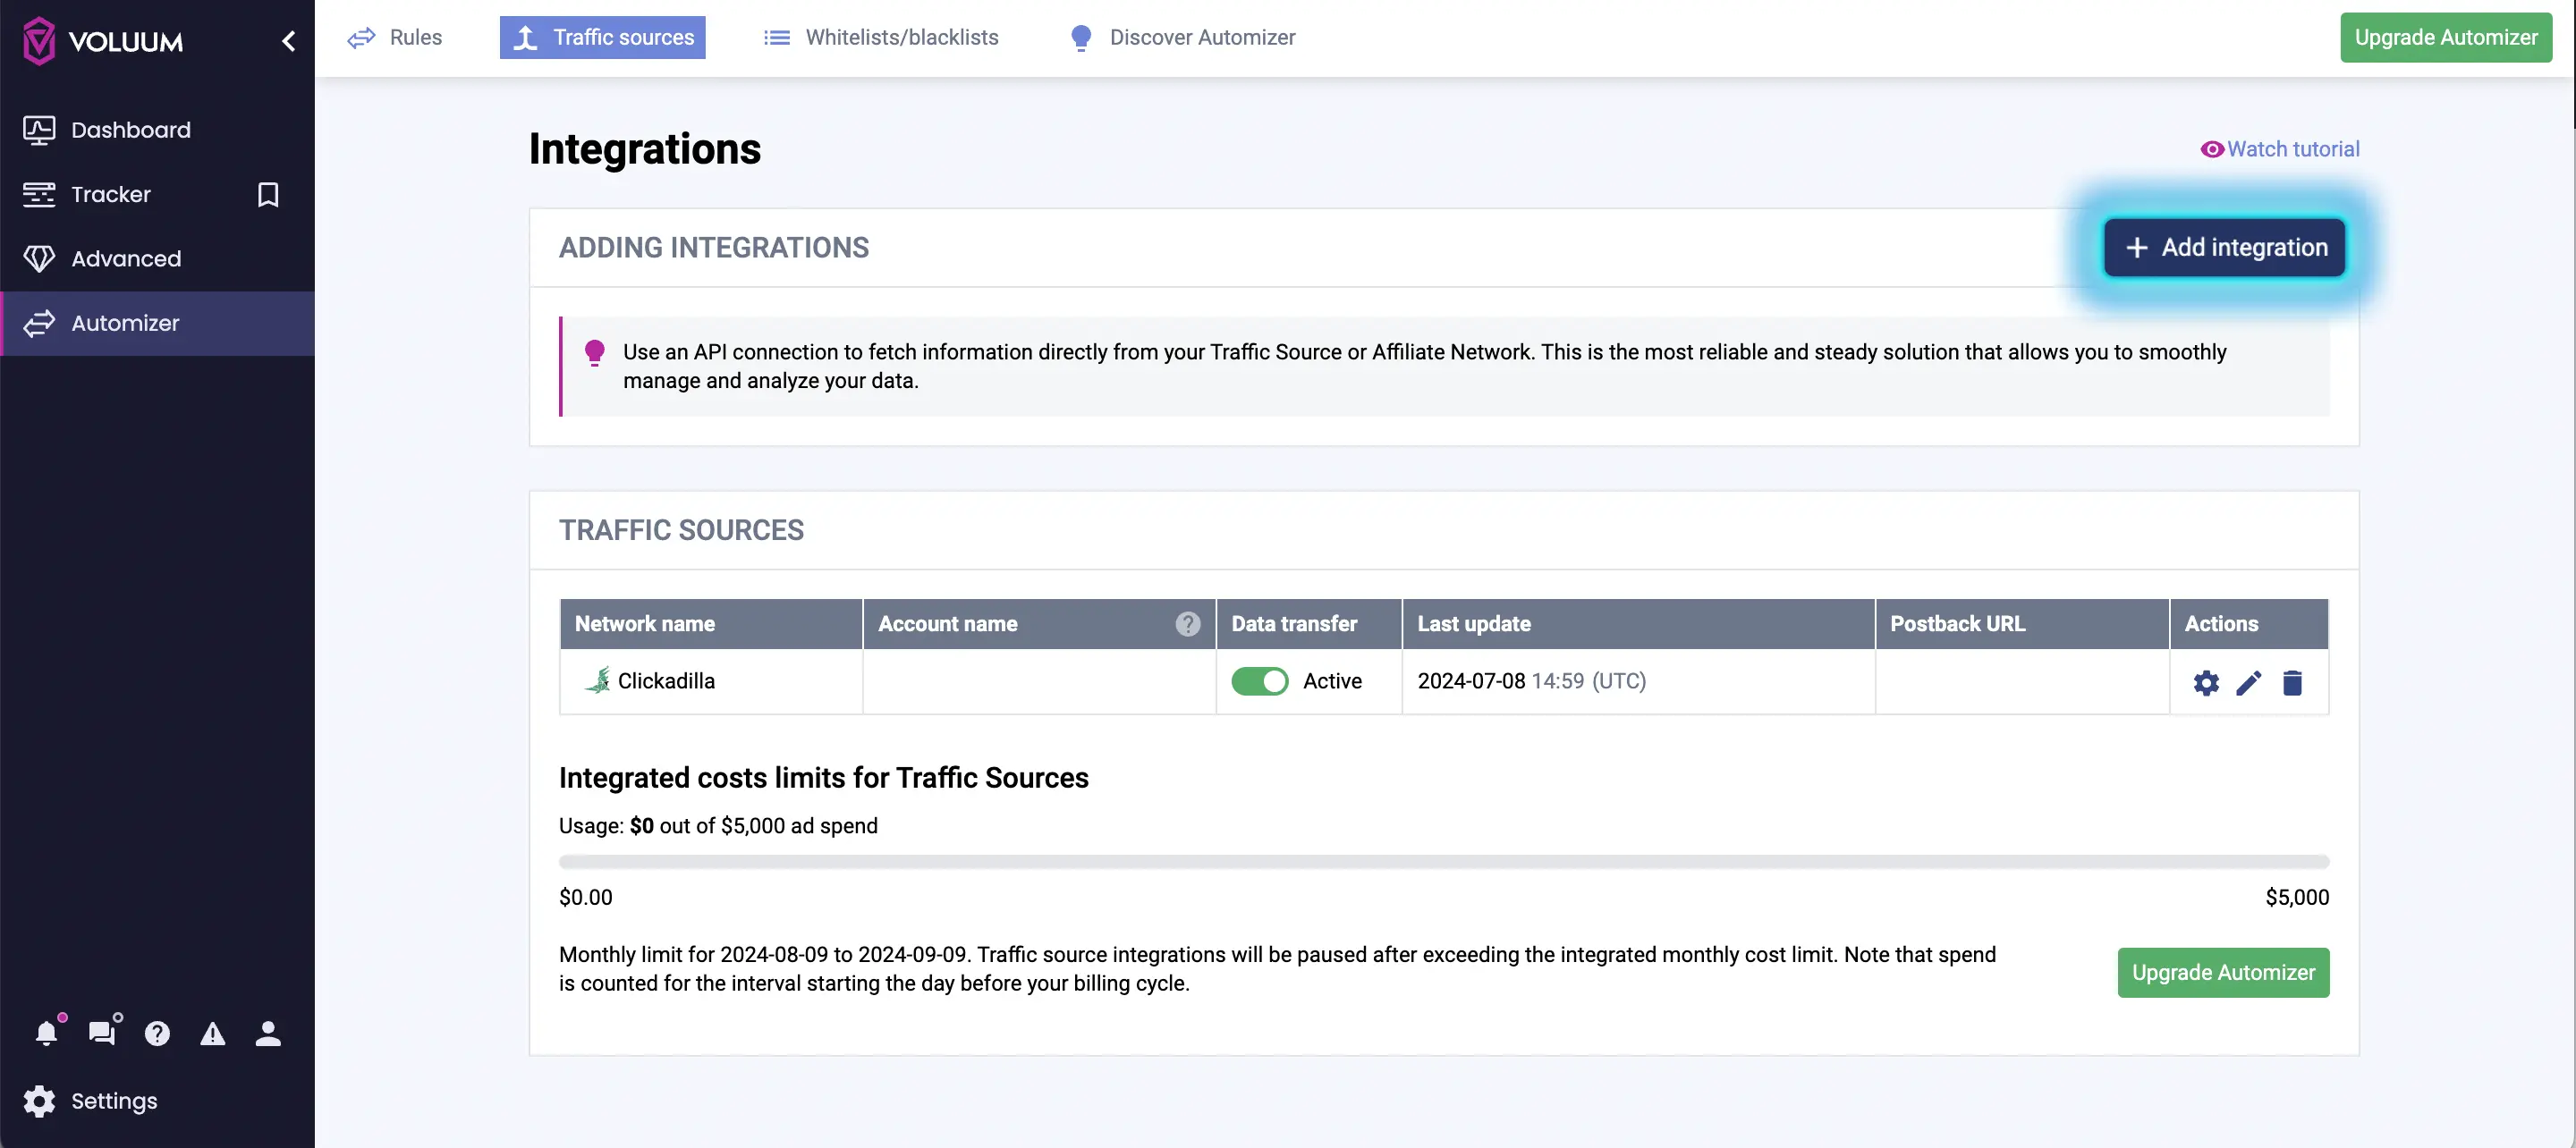
Access the AUTOMIZER Module in Voluum:
- Log in to your Voluum account.
- Navigate to the AUTOMIZER module on the left-hand side of your dashboard.
Add ClickAdilla as a Traffic Source:
- Go to the Traffic sources tab.
- Click the Add traffic source button.
Find and click the Add integration link under the ClickAdilla traffic source.
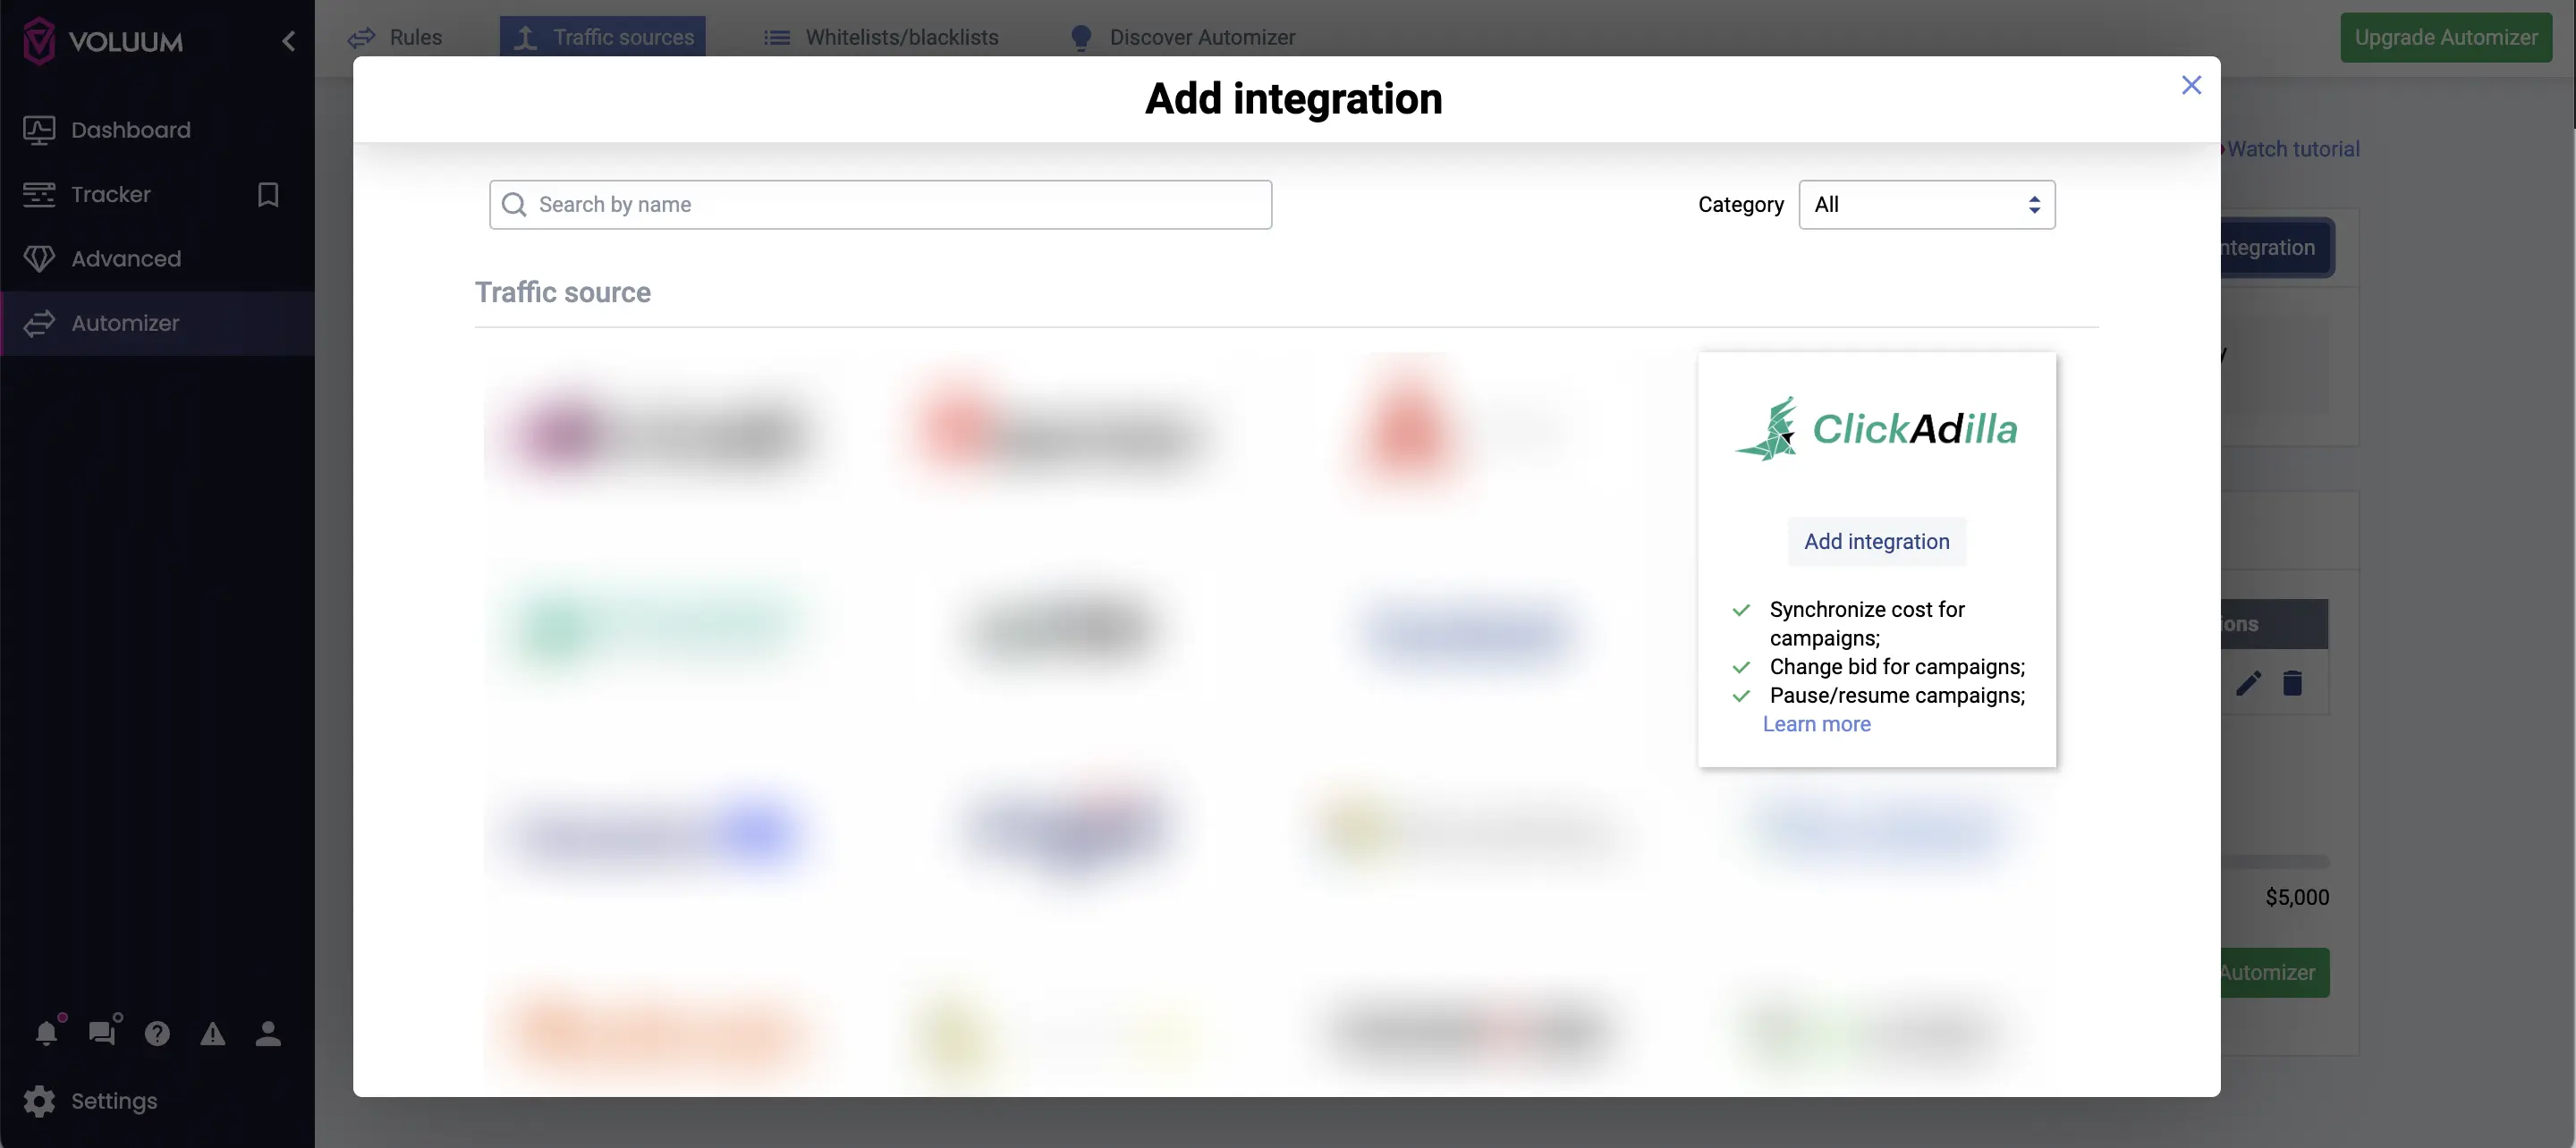
Enter Your API Key:
- In the API token text field, paste the API key you copied earlier from ClickAdilla.
- (Optional) You can provide a custom account name for easier identification
- (Optional) Decide if you want to enable cost estimations based on the last 24 hours of data. These estimations will be replaced by actual costs once the data is synchronized.
- (Optional) Choose whether to have your campaigns automatically matched. If you prefer manual matching, you can disable this feature.
Finalize the Integration:
- Click the Add integration button.
Important Note: When you integrate through the full API, the cost information passed will override any manual cost settings you've previously configured in Voluum. If you enable cost estimations, these will also take precedence over your manual entries until the next data sync.
Step 2: Managing Your Integrated Campaigns
Once the integration is set up, your ClickAdilla campaigns will appear in Voluum, marked with a special icon. Here’s how you can manage them:
Check Campaign Status:
- The status of your integrated campaigns will be displayed in the Status column.
- This allows you to monitor performance at a glance.
- Pause or Restore Campaigns:
- If you need to pause a campaign, simply click the pause button in the Actions column.
- To resume a paused campaign, click the play button.
These changes are applied instantaneously, meaning your campaigns are always under your control.
With ClickAdilla and Voluum now fully integrated, managing your campaigns has never been easier or more effective. With the power to control your campaigns and access detailed analytics all in one place, you can make faster, data-driven decisions to optimize your marketing efforts. We’re proud to offer this enhanced capability to our users and look forward to seeing the positive impact it will have on your campaigns.
Ready to get started? Head over to your Voluum account now and set up the integration to experience the full benefits of managing your ClickAdilla campaigns like never before.
Log in to your ClickAdilla account and start exploring new advertising possibilities today!
![[Case Study: +39% ROI] How I ran $200 on Japan Dating In-Page from scratch and with zero KYC. Inside settings from Clickadilla's Head of Accounts.](/_ipx/f_avif&s_280x160/storage/blog_twitter_linkedin_15f9453250/blog_twitter_linkedin_15f9453250.png)


