
Postback tracking is essential for optimizing ad campaigns on ClickAdilla. In this guide, we explain how to set up postback for seamless conversion tracking and better results.
For ClickAdilla, postback serves as a crucial tool for advertisers to track key actions such as installations or purchases, enabling them to directly measure the performance of their ad campaigns. By leveraging real-time data, advertisers can swiftly optimize their campaigns, focusing on high-performing ads while discontinuing those that underperform. This approach maximizes the return on advertising investment and enhances the overall success of their campaigns. In this article, we will explore the concept of postback and provide guidance on its setup and implementation.
Why Do You Need a Postback?
A postback is not just a means to track your campaign; it also ensures transparency and efficiency in tracking conversions, which is crucial for optimizing ad spend and ensuring accurate payouts.
The reason you need postbacks is for ad optimization. Rich data supplied through postbacks can significantly improve your ad performance. Furthermore, ad channels equipped with postback data gain insights into user interactions, identifying those who clicked on ads and triggered install or purchase events. This data helps determine the channel's contribution to these actions, creating a more refined target audience.
How Postback works
Postback is a reliable way of conversions’ mainstreaming. It will make your campaign optimization easier, transferring data from an affiliate network to the tracker or ad network.
How does it work? It’s simple:
- A click ID is attributed to any user’s click. When the targeted action is performing, the system recognizes that a certain click ID is a conversion itself.
- Information about conversion is transferred to the affiliate network's server and then to your tracker’s server.
- You can set up conversion tracking from your affiliate network or tracker to the ad network’s server.
Ways of information transfer with Postback:
- affiliate network’s server → tracker
- affiliate network’s server → tracker → ad network’s tracker
- affiliate network’s server → ad network’s server
Usually, a tracker is suitable when a few traffic sources or affiliate networks are used.
How to set up postback via your affiliate network
Let’s use ZeyDoo as an example.
1. Choose one of the offers from the Zeydoo platform and get an Offer URL containing the parameters {ymid} and {var}.
- {ymid} - the parameter responsible for conversion transfer
- {var} - traffic source ID
2. Go to your ClickAdila Account and copy your postback URL then paste it into your ZeyDoo account into the field designated for postback. Remember, the ymid and var parameters should be equated to the corresponding macros on the side of the tracker (or ad network).
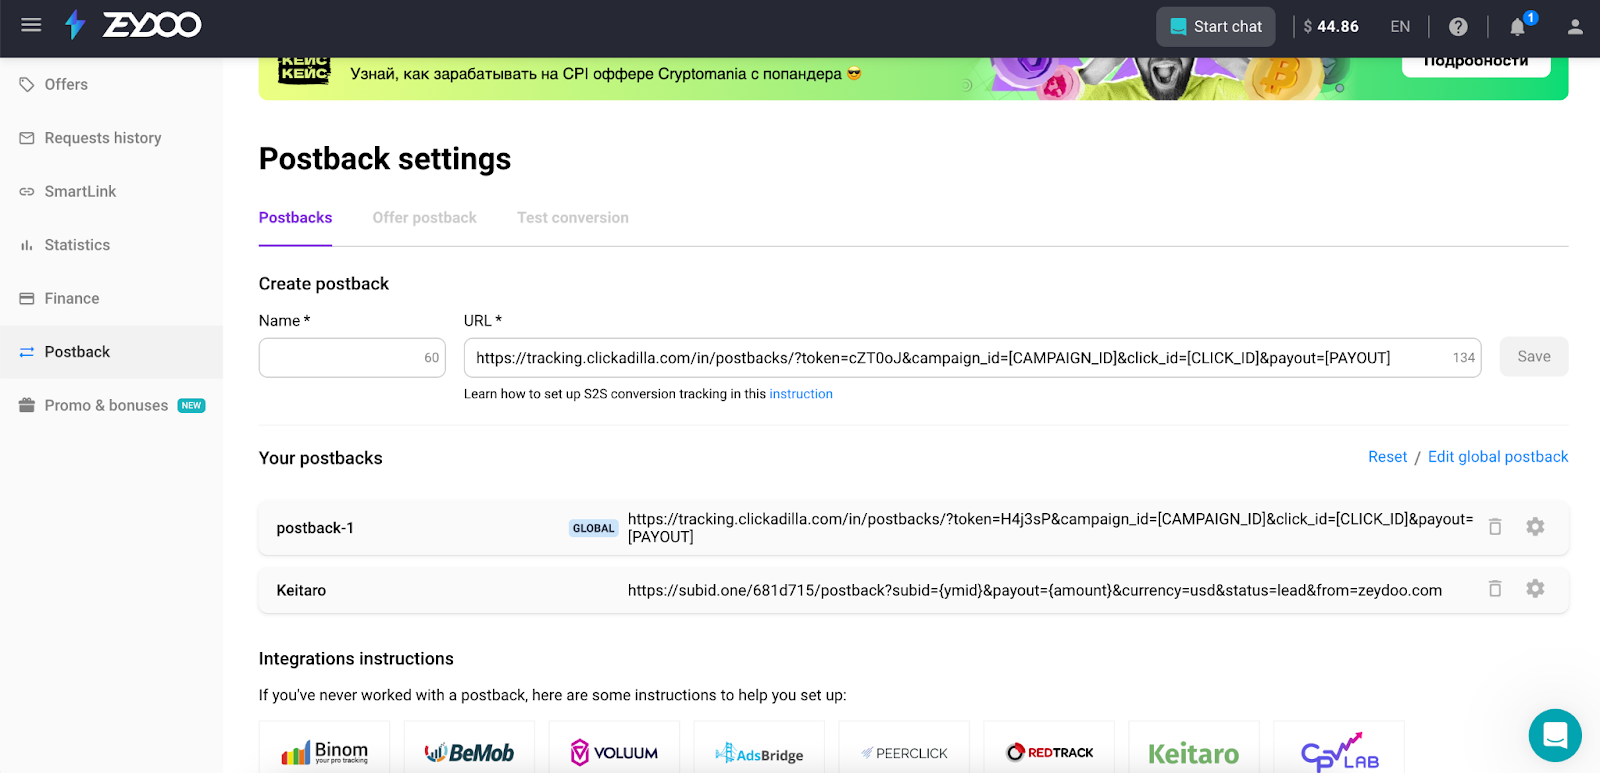
3. After pasting the postback URL to ZeyDoo, remove payout, campaign id, and leave only the click id. Then add ={ymid}.
4. Therefore, if the original URL looks like this: https://tracking.clickadilla.com/in/postbacks/?token=fNDxmh&campaign_id=[CAMPAIGN_ID]&click_id=[CLICK_ID]&payout=[PAYOUT]
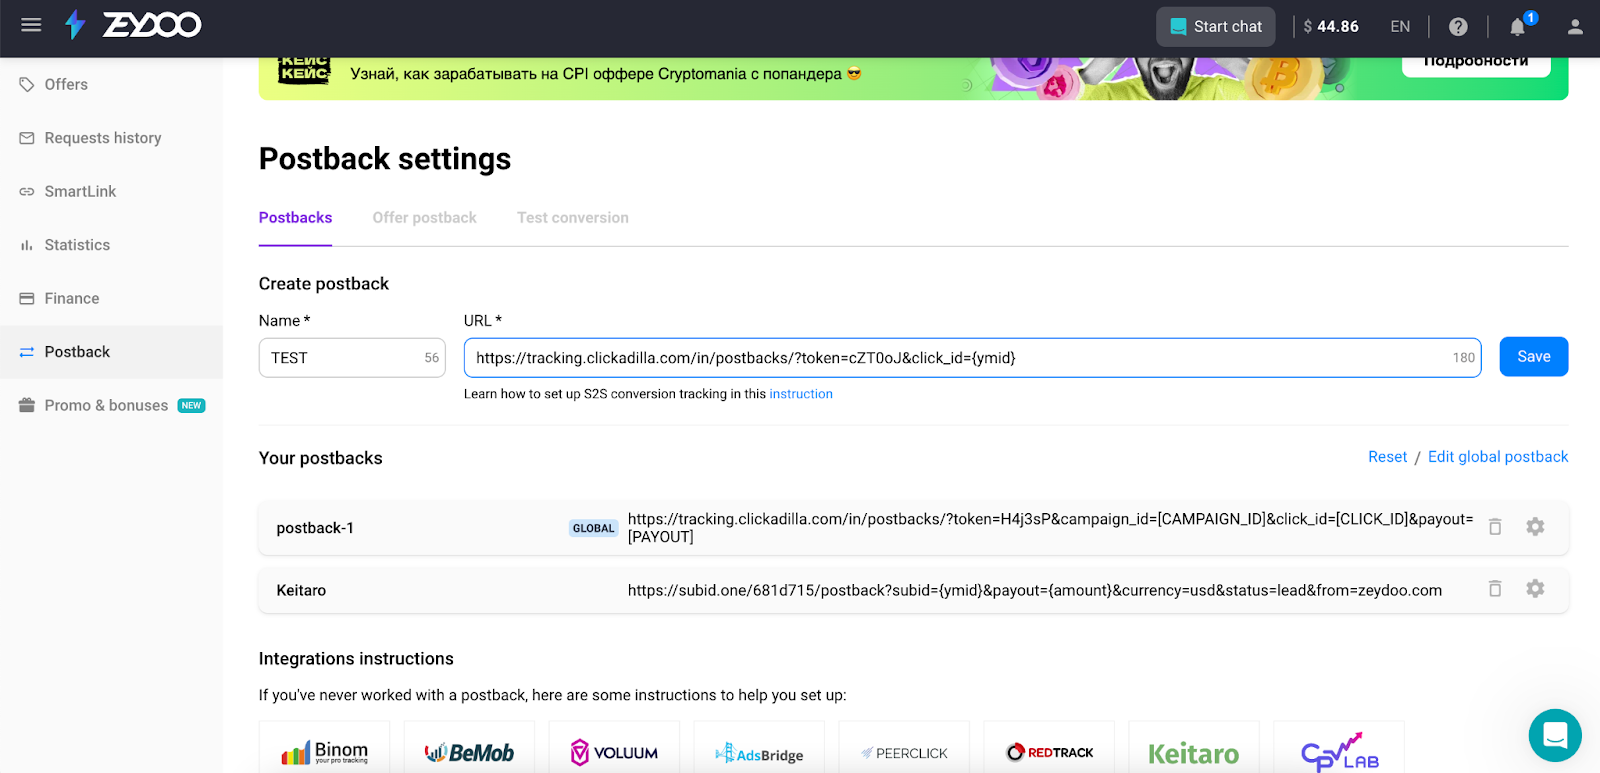
5. The final link should look like this: https://tracking.clickadilla.com/in/postbacks/?token=cZT0oJ&click_id={ymid}
So the link in the affiliate network postback section should look like this
Setting Up Postback via Tracker
Let's use BeMob as an example.
Step 1: How to add an ad network to traffic sources at BeMob tracker
1. Create your postback URL
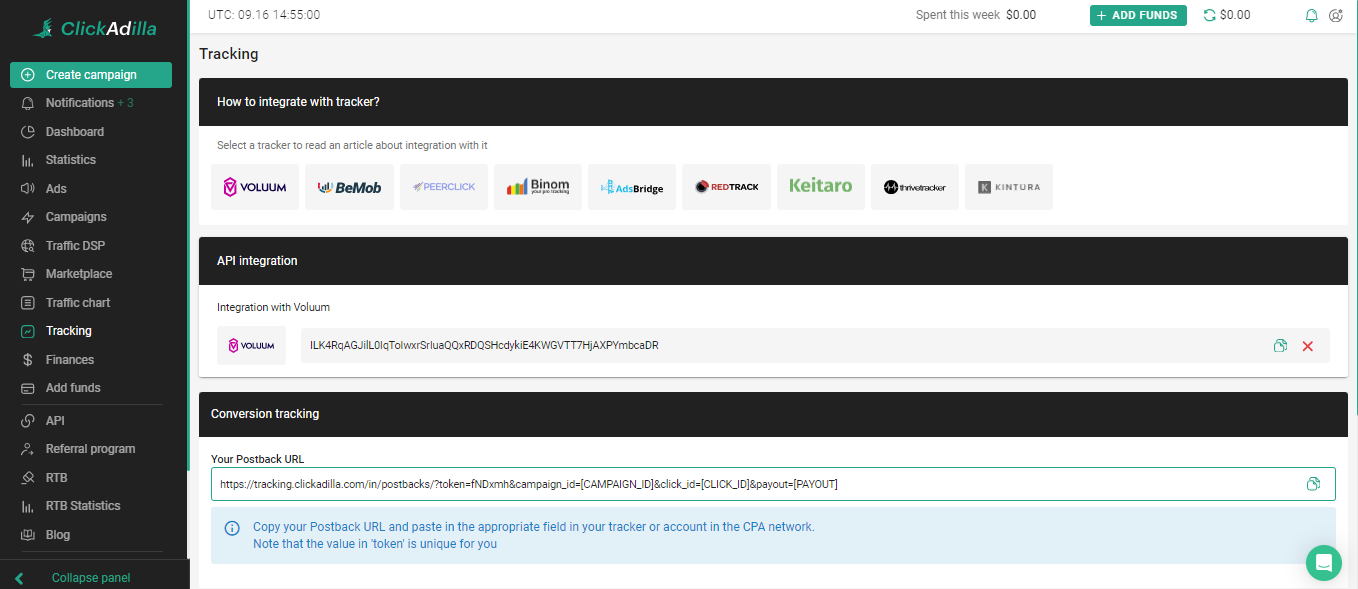
Log in to your ClickAdilla Advertiser Account and click the Tracking tab.
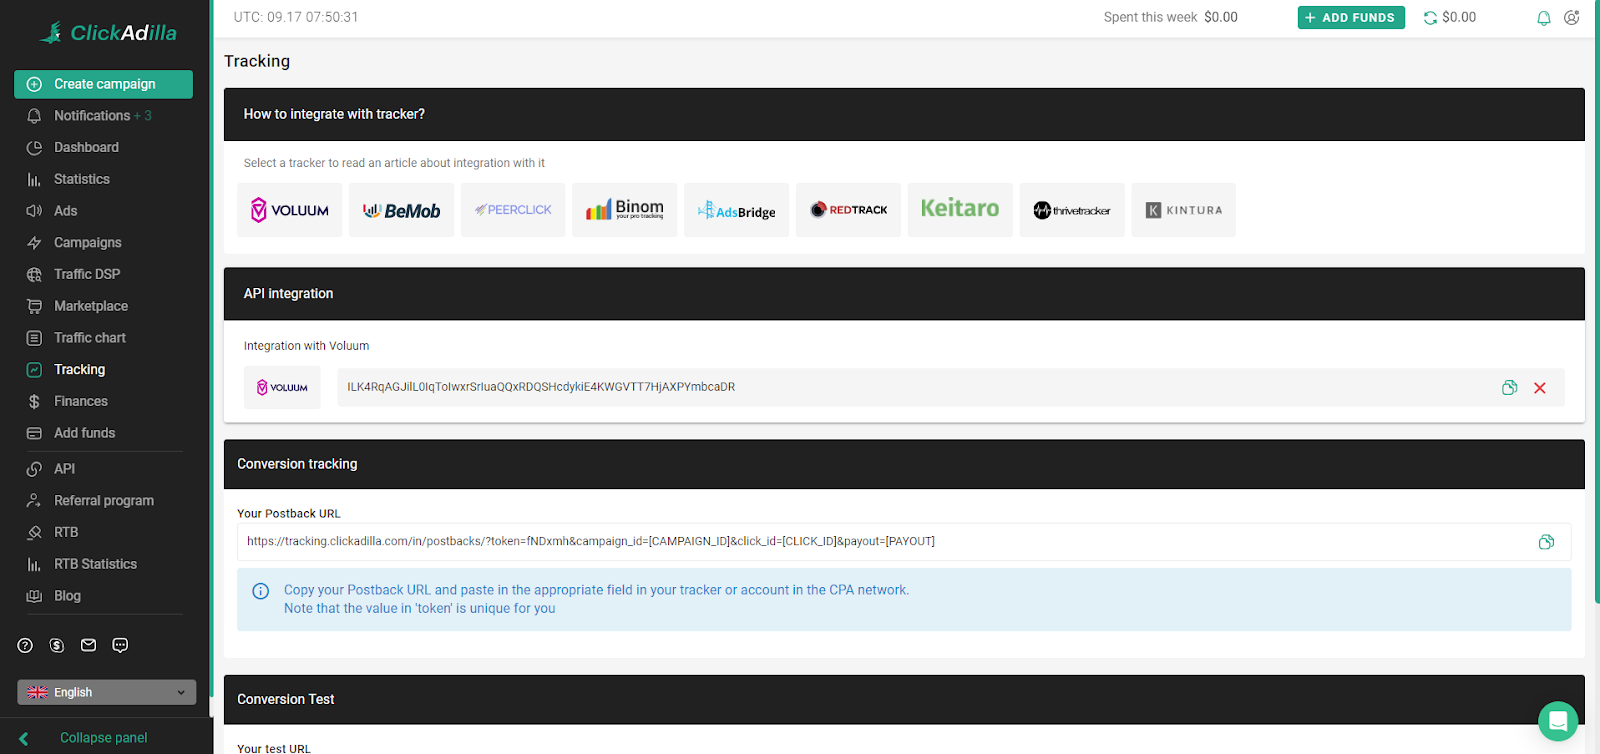
Your Clickadilla postback URL is created automatically.
This is your unique token, located after “/?token=”. You will need it in Step 2
2. Create a new traffic source at BeMob
Click on the “Traffic Sources” tab in the tracker upper panel. Then click the “New” button and select “New From Template”.
3. Enter the traffic source’s name
In the search bar type “ClickAdilla”, then select the traffic type. After that, click “Next”.
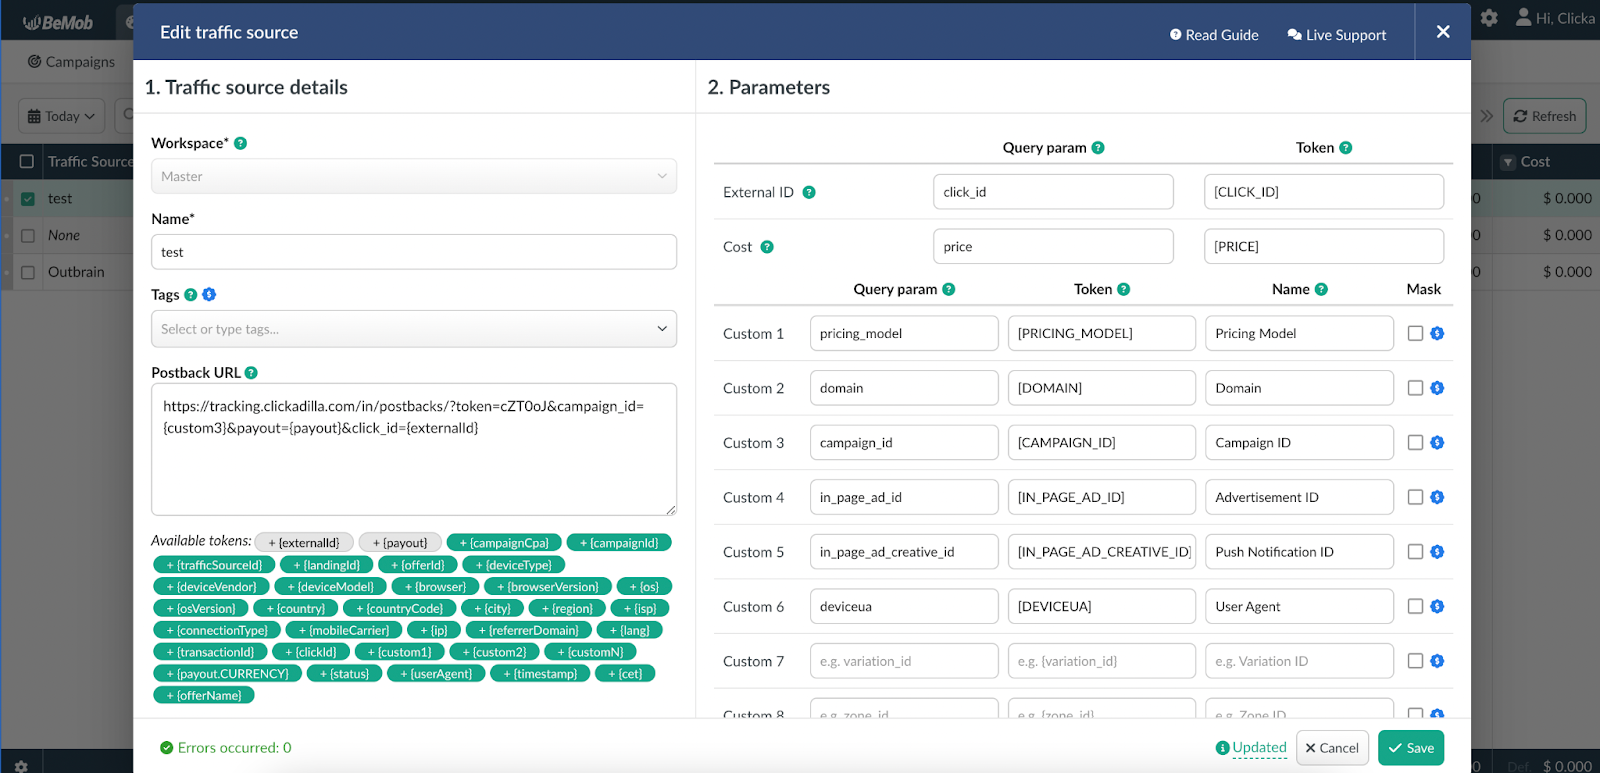
In the newly opened window, you need to specify some info:
- Enter traffic source’s name in then “Name” bar
- In the Postback URL you will see the resulting postback link
- In this link, replace /?token=REPLACE with your unique token that you received in your Clickadilla account
4. Save changes
The template will automatically fill out the form, so you just need to click the “Save” button in the bottom right corner of the form. This completes the connection of the traffic source to the tracker. The next step is integration with the affiliate network.
Then, press the “Save” button.
5. Add postback at the affiliate network
Now you need to set up the offer postback at the affiliate network. In order to do that, proceed to the offer and press “Add postback”.
Step 2: How to Create a Tracking Stream at BeMob
If you’ve added a couple of offers, then you need to create a tracking flow, so that it would unite the conversion tracking process. To do that, you need to:
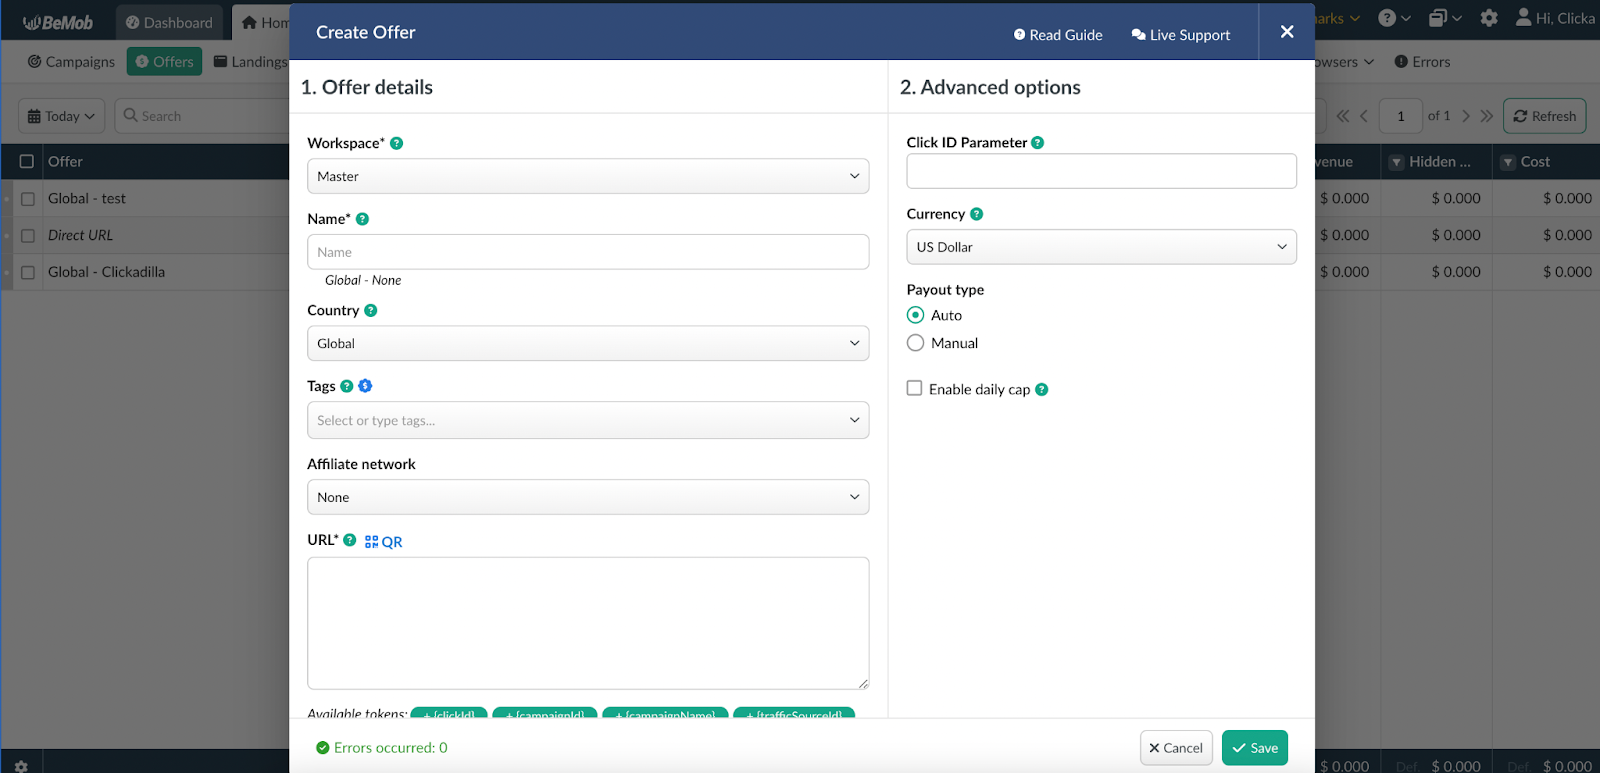
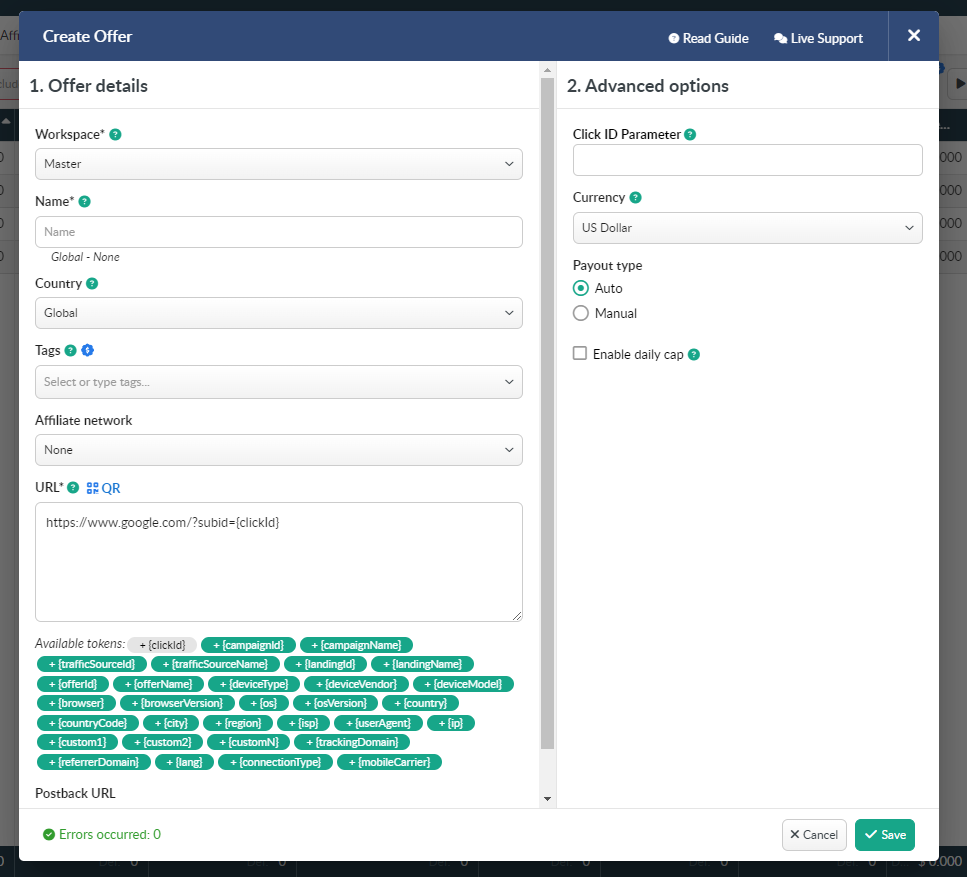
1. Create an offer in which the affiliate network ID is specified as the click ID of the tracker. As shown in the screenshot, subid={clickId}
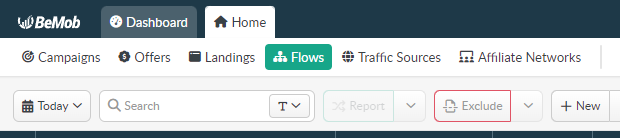
2. Add a new flow at BeMob
Find the “Flows” tab in the tracker’s upper menu, then click the “New” button.
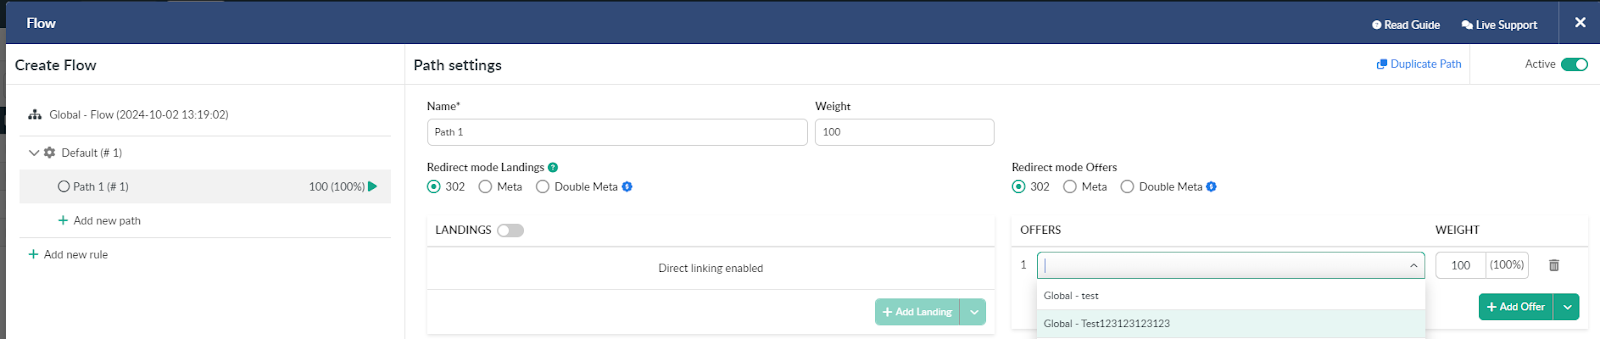
3. Adjust the flow’s settings
In the newly opened window click “Add new path”. Then select the type of redirect and add landing pages, or disable the function if you don’t have them. You can enter the exact same info as in the picture. After that, add the offers you’ve connected by clicking the “Add offer” button and choosing the needed ones or creating a new one.
If everything is correct, click “Save”. Now you can set up your campaign in your tracker and Clickadilla!
Ready to set up your postback and boost your conversions? Contact us now, and we’ll help you create effective campaigns that deliver better results!
![[Case Study: +39% ROI] How I ran $200 on Japan Dating In-Page from scratch and with zero KYC. Inside settings from Clickadilla's Head of Accounts.](/_ipx/f_avif&s_280x160/storage/blog_twitter_linkedin_15f9453250/blog_twitter_linkedin_15f9453250.png)


